How to remove write protection from a flash drive - instructions! The “disk is write-protected” or “flash drive is write-protected” error usually happens at the most inopportune moment. If you started reading this article, then you turned out to be one of those “lucky” people who at one point decided to put something on your flash drive, but in the end received a message from the system that you cannot write data to the disk and now this very protection needs to be removed. A person who has encountered something like this for the first time reasonably appears completely bewildered. Let's try to find out the reasons why we can't write files to a flash drive and figure out how to fix this problem.
Content:
Causes of the error “The disk is write-protected. Remove protection or use another disk."
It is quite logical that such a problem arises if the operating system queries the disk, but does not receive write rights. In this case, it is not possible to write files, although at the same time data can be read without any problems. The reasons for this behavior vary, but clearly fall into two groups:
- Software glitch.
- Hardware failure.
It is important to understand that both types of problems can happen both on the flash drive and on your computer.
Types of write protection
By analogy with the reasons for the “media is write-protected” error, write protection methods can also be divided. A classic example of hardware protection would be the presence of a special switch (on the body of a flash drive) that turns on and off the ability to write to a flash drive.
Software protection consists of various types of software systems designed to prevent unauthorized use of the drive.
 When deciding how to remove the protection if “The disk is write protected”, first of all check if there is a special small switch on the case. It is always present on SD cards, and is somewhat less common on regular USB drives. Accidental switching is not uncommon when a flash drive is carried in a pocket.
Also, be sure to check the functionality of the flash drive in other USB ports, or even better, on another computer. If you are the owner of a desktop computer with a system unit, it is preferable to check the flash drive by connecting to the ports on the back wall of the system unit. The problem may lie in poor contact, poor-quality wires, or failure of the USB controller.
Software removal of write protection
After making sure that there is no mechanical protection problem, we proceed to checking the software.
By default, the flash drive is formatted using the FAT32 file system. A small number of users are aware of the limitation in this file system to the maximum file size of 4Gb. This results in a twofold situation: formally there is permission to write, but a message about the impossibility of doing so appears. If you need to transfer large files, format the drive using NTFS - a system where there are no such restrictions. To do this, open “My Computer,” right-click on your removable drive and select “Format.” In the window that appears, in the “File system” line, select NTFS, click “Start”.
Important! It is always better to use “safe removal” before removing the flash drive from the connector. Due to some features regarding flash drives formatted in NTFS, this should be a mandatory rule.


The blocking can be set in the Windows registry. The Windows key combination + R will open the Run window, type regedit and click OK.
In the editor window, go to the HKEY_LOCAL_MACHINE\SYSTEM\CurrentControlSet\Control\StorageDevicePolicies section, where you will see the WriteProtect parameter on the right. Double-click on the parameter to bring up a dialog for changing the parameter, set the value to 0. The StorageDevicePolicies section may be missing and you will have to create it. To create, right-click the previous Control section, select “New > Section”, the name should be StorageDevicePolicies. In the empty area on the right side of the window of the newly created section, right-click again, select “New > DWORD Value” in the menu, select 64 or 32 bits, depending on the bitness of your system. Name the parameter WriteProtect and set the value to 0 as described above. Be sure to reboot and check the result.
Make sure that recording to removable devices is not prohibited by group policy. Similarly to launching the Registry Editor, execute gpedit.msc, which will bring up the “Local Group Policy Editor”. Follow the branches “Computer Configuration - Administrative Templates - System - Access to Removable Storage Devices”. On the right, check the “Removable drives: Deny writing” option. It should be disabled or not set. If the option is enabled, double-click on it, select Disable, and apply the selection. Don't forget to reboot before checking.
Check the system with a good antivirus with the latest databases. There are a number of malicious programs that block the ability to work normally with connected portable storage devices.
A significant number of Windows users prefer the Total Commander file manager, which offers extensive features and ease of use. It is important to understand that Total Commander is essentially just a convenient add-on for Windows, so everything described in the article applies to it. However, there are nuances. Try copying your files in Windows Explorer, if there are no problems with copying in Explorer, open “Configuration > Settings: File Operations” and select “Automatically select copy method”. The authors of some builds of this manager set settings that cause such failures.
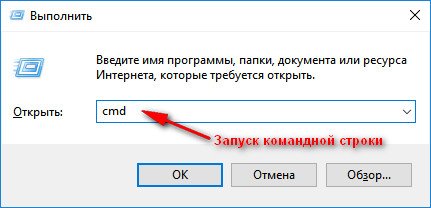
Remove write protection in the command line (cmd)
How to remove protection from a write-protected flash drive using the command line. The method is a little more complicated. Find the Command Prompt application in the Start menu and run it with administrator rights. Next, enter the following commands one by one, confirming each entry by pressing Enter.
Attention! All contents of the flash drive will be deleted permanently!
- Diskpart– launches the disk management utility;
- list disk– will display all disks connected to the system, you need to determine which of them is your flash drive, for which you can use the size of the disk;
- select disk X– targets the program to a disk; instead of X, specify the number of the desired disk;
- detail disk– will show detailed information about the selected disk to ensure that the choice is correct;
- attributes disk clear readonly– resets the read-only attribute;
- clean– all volumes and partitions on the disk will be deleted;
- create partition primary– re-creates the main partition;
- formatfs=fat32– formats the partition using the FAT32 file system (you can select the NTFS file system with the commandfs=ntfs);
- exit– terminates the program.
Programs for removing write protection
Flash drive manufacturers take care of solving various types of problems that arise with their products, releasing proprietary utilities for restoring problematic devices. Do not forget that you must run any of these utilities with administrator rights. These useful programs can be freely downloaded from the respective manufacturers' websites. Transcend calls it , Silicon Power calls it , Adata calls it , Kingston calls it . Their use is quite simple and does not cause difficulties even for beginners.
The programs listed below are designed for advanced users and you should read the documentation before using them. Independent developers release their own universal programs that are not tied to any vendor, but have similar functionality.
Popular representatives:,AlcorMP.
The latter only works with drives on the controller of the same name, but all have the same task - to help restore the problematic device. When faced with finding a solution to how to remove protection from a flash drive, as a last resort, you should try to reflash it. Flash Drive Information Extractor will tell you complete information about the type of controller, the memory used and even the production date.
Kingston Format Utility is a utility for improving the performance of a flash drive and eliminating all common problems with it...
MiniTool Power Data Recovery - will recover flash drives quickly and easily
MiniTool Power Data Recovery is a specialized program for recovering external storage media, such as flash cards,…
The era of floppy disks is long gone, but sometimes when trying to write to a flash drive, the user may encounter a situation known since the days of using floppy disks - the removable disk is locked and cannot be used to write files.
We will look at how to solve this problem in detail in our article today.
So, you need to write some information to a flash drive, you insert it into the connector and receive a message like “The disk is write-protected, remove the protection or use another disk.”
This problem can be solved quite quickly, and we will talk about this a little later, but now we should say a few words about the purpose of installing write protection on a flash drive.
Note! As a rule, this operation is performed for only one purpose - to protect the flash drive from viruses that can spontaneously be copied to removable media without the user’s knowledge.
Methods for removing write protection from a flash drive
There are 2 key ways to remove protection from a flash drive: hardware and software.
The hardware method is to install a lock switch, which is present in some models of USB flash drives, as well as SD cards. As a rule, the switch is located on the side edge of the drive.
Carefully inspect your existing drive and look for an open/closed lock icon or the word Lock on it.
Note! Removing the protection is very simple - you just need to move the locking lever in the opposite direction. Write protection has been removed. Insert the flash drive into the appropriate slot and repeat the file writing operation again.
The software method involves software interaction between the operating system and the flash drive controller, which is responsible for the ability to record information.
You can remove write protection programmatically using the command line, registry editor, or local group policy in Windows 7/8. Let's take a closer look at all of the above methods.
Removing protection using regedit
Step 1.“Start”, in the search field enter the name of the Windows registry editor - regedit. Right-click (RMB) on the program and in the context menu go to the “Run as administrator” item.

Step 2. Let's go to the StorageDevicePolicies section:
HKEY_LOCAL_MACHINE\SYSTEM\CurrentControlSet\Control\StorageDevicePolicies
Important! If there is no such section, you need to create it. To do this, right-click on the section Control - New - Section. We name the section “StorageDevicePolicies” without quotes.

Create (RMB in the right column of the registry) a DWORD value (32 bits) in the created registry branch. For convenience, let's call the created element WriteProtect.

Step 3. You need to make sure that the value of the WriteProtect parameter is 0. Right-click on WriteProtect and select “Change”. If the value is “1” you need to change it to “0” and click “Ok”.

Step 4. Close the registry editor, remove the flash drive and restart the computer. Insert the flash drive. Now the flash drive works as usual, allowing you to write files.
Removing protection using Diskpart
If the flash drive could not be unlocked using the registry, let's try to do it using the Diskpart command interpreter, which allows you to manage disks and partitions using commands that the user enters at the command line.
Step 1.“Start”, in the search field enter the name of the Windows command line - cmd. Right-click in the program and select “Run as administrator” in the context menu.

Step 2. Now you need to enter the commands: diskpart and list disk, and after entering each of them, press the Enter key.
Step 3. In the list above, you need to determine what serial number in the name the flash drive has.
This can be done based on the specified size, in our case an 8 GB flash drive, presented in the table as “Disk 1” with a capacity of 7441 MB.
Step 4. We select the disk with the “select” command, clear the attributes that allow only reading “attributes disk clear readonly”.
If the flash drive needs to be formatted, you should enter the following commands “clean”, create a partition “create partition primary”, format it to NTFS “format fs = ntfs” or FAT “format fs = fat”.

Removing protection using the Local Group Policy Editor
Step 1. Open the editor by pressing the Win + R key combination, after which you should enter the command gpedit.msc and press “OK” or Enter.

Step 2. In the editor, open the branch: Computer Configuration - Administrative Templates - System - Access to Removable Storage Devices. And look at the status of the “Removable drives: Deny reading” parameter.
If the parameter is enabled, you must disable it.

Step 3. To disable recording restrictions, double-click on the parameter and in the window that appears, select “Disable”, “OK”.

If all the methods described above did not help solve the recording problem, you can try going to the official website of the flash drive manufacturer and looking for proprietary utilities for working with the drive.
It is also possible that the flash drive has exhausted its resource (there is a limit on the number of rewrites, after which the drive is switched to read-only mode) and the only way out of the situation is to buy a new flash drive.
Question from a user
Hello. I'm trying to write one Word document from my hard drive to a flash drive, but an error appears that the drive is write-protected. This has never happened before, I didn’t hit the flash drive, didn’t drop it, didn’t do anything with it...
Interestingly, I tried to delete some file from the flash drive - exactly the same error appeared, no access. Those. in fact, I can only copy previously recorded data from a flash drive. Tell me how to remove this error?
PS Windows 7, 8 GB Kingston USB flash drive (the most common)
Hello.
Such an error can be caused by several reasons: a hardware malfunction of the flash drive (for example, if you accidentally dropped it before), a virus infection, “manual” installation of write protection, etc.
In this article, I will look sequentially at all the popular causes (causing this error) and ways to eliminate them. I think that by presenting the article in a similar format, it will be simpler and easier for you and other users with the same error to solve the problem.

Typical error when deleting a folder from an SD card // example
Reasons blocking writing to a flash drive
We will eliminate it consistently!
1) Check if there is a hardware write lock
Experienced users probably remember that floppy disks used to have a small lever, thanks to which it was possible to protect the information on it from unwanted deletion (or modification). And in my opinion, the thing was extremely useful!
Nowadays, most USB flash drives do not have such protection; some manufacturers (mostly Chinese) produce such flash drives. Therefore, some users do not attach much importance to some “locks” on the flash drive body. Meanwhile, if the protection is turned on, then you will not write anything to such a flash drive (see photo below).
Well, SD cards (used in cameras, for example) have a small switch on the side. If you move it to the Lock position, the flash drive becomes read-only.

The moral of the last sentences: first of all, check whether there is mechanical write protection, whether the lever is positioned correctly (and in general, whether your device has one).
2) Is the flash drive (computer) infected with a virus?
I remember my student days... When it was necessary quite often to bring and connect a flash drive to computers “infected” with viruses (and knowingly and knowing about it in advance) - otherwise it would be problematic (if not impossible) to print materials. After such a connection, I had to check the flash drive for viruses and clean the “infection”.

If you do not have an antivirus on your computer, I recommend choosing one from the list:
3) Is there room on the flash drive?
I understand that this question is somewhat banal, but still. If the size of the recorded file is larger than the remaining free space on the flash drive, you may receive a recording error.
To find out how much free space is left on the flash drive: open "My Computer", then right-click on the flash drive and open it properties. In the tab are common- it will be indicated how much space is occupied and how much is free.

4) Isn't it worth writing protection in the registry?
First you need to open the Registry Editor as an administrator. This can be done, for example, through the task manager: to launch it, press the keyboard shortcut Ctrl+Shift+Esc(or Ctrl+Alt+Del ).
Next click file/new task and to the line open enter the command regedit(note that the task will be performed as an administrator).

By the way, you might find the article on how to open the Registry Editor useful.-
(for Windows XP branch: HKEY_LOCAL_MACHINE\System\CurrentControlSet\Services\USBSTOR )
Important! If the branches StorageDevicePolicies will not be in the registry - it means you do not have a blocking entry in the registry. Just in case, you can create a branch (a branch in the registry is analogous to a folder in Explorer) and then the Write Protect string parameter with the value "0". Creating branches and parameters resembles working in a regular Explorer, the same as creating a simple folder.


5) Check the file system of the flash drive for errors
A similar error can also appear due to errors in the file system of the flash drive. For example, in the process of copying a file, you removed the flash drive from the USB port or simply turned off the light - errors could well appear on it (by the way, the file system may be marked in such cases as RAW).
To check the flash drive for errors, open "My computer", then open properties flash drives, and in the section service click the button (check the disk for errors, see screenshot below).

6) Is there a Read-Only attribute on the flash drive?
Another reason why Windows may give an error when writing a file to a USB flash drive is read-only attribute (if it is installed on a flash drive). There is nothing wrong with this attribute, it just tells the system that this disk is read-only, so it does not write data to it.
By the way, this happens quite often if you have picked up certain types of viruses, or, for example, downloaded something from torrents (the uTorrent program often creates files with a read-only attribute).
And so, let's remove this attribute.
7) Check if there is any protection in the Group Policy Editor
Writing to a flash drive can be disabled through the Group Policy Editor. Therefore, I also recommend checking if the treasured parameter is there...
Note: users of Windows entry-level and home versions will not be able to open the Group Policy Editor.
To open the Group Policy Editor:
- press a combination of buttons Win+R;
- enter the command gpedit.msc;
- click Enter .

It should have the option "Removable drives: disable writing". Open it and see if it's turned on...

By default, the parameter should be set to “Not set” (see screenshot below). If this is not the case for you, switch it to this position, save the settings and restart the computer.

Parameter responsible for prohibiting recording
8) Formatting a flash drive
Perhaps this is the last thing you can do if all other advice has been in vain and led nowhere. Formatting the media helps in many cases, including with our error, discussed in this article.
Note: copy all the necessary data from the flash drive; when formatting, everything will be deleted from the flash drive (just in case, I warn you ☺)!
In most cases, to format a flash drive, just go to "My computer", select the flash drive among the disks, right-click on it and select the command in the context menu "Format" .

If you fail to format the media: errors appear, the computer freezes, etc., then you need to use special utilities to format it. One of these that I recommend is HDD LLF Low Level Format Tool.
HDD LLF Low Level Format Tool
A small utility used for low-level formatting of disks and flash drives. Helps in the most difficult situations when it is impossible to format the media through Windows. Interfaces supported: S-ATA (SATA), IDE (E-IDE), SCSI, USB, Firewire.
The utility is distributed in several versions: there is also a portable version that does not require installation.
Because There is no Russian in the program, I will show with an example how the media is formatted.
After launching the utility, click the button "Continue for Free".


When it ends, Windows will prompt you to format the flash drive (you can format it in the usual way through “My Computer”). As a rule, after low-level formatting, a flash drive can be formatted easily and without errors in Windows.
By the way, if your flash drive still doesn’t work, I recommend trying to restore it. Here is another way described in this article:
That's all I wanted to say! I would be grateful for any additions on the topic.
Most users have flash drives (usb sd, transcend, microsd, kingston, sandisk, cd, flash, qumo, microsd, apacer, verbatim, sdhc, psp), hard drive d (hdd), dvd or any other removable or local storage .
You probably use them with great regularity. They allow you to copy your media, photos and important documents.
Despite their high resistance to mechanical damage and the ability to store data for many years, like all other gadgets, they deteriorate.
One of the most common errors that can affect USB flash drives, memory cards or disks is an annoying message: the “Disk is write-protected” error.
Those who have ever had a similar problem know exactly what I mean.
Inability to copy/add/delete any files - this can lead to frenzy.
After trying hard to repair, most end up giving up on the fixes and buying new ones.
What should I do if the system writes the disk is write protected? How to remove this notorious protection?
Here are some simple but effective solutions to restore a disk or flash drive to a working state.
Use these simple tips and simply forget about the message: “the disk is write-protected,” although there is one point here that I have encountered more than once.
Sometimes the system displays damaged media (flash drive, disk) as write-protected. How to revive drives
It's a microprocessor issue. If it fails, even partially - you can read it - you can copy or format it - no), then only a utility from the drive manufacturer can fix it, and even then not always.
Let's start unlocking disks and flash drives
You have a USB flash drive connected to your computer and you want to copy some files.
Here a surprise awaits you: “The disk is write protected. Please remove write protection or use another drive."
Then you say, "...fuck, how did this happen"? Don't panic - take a deep breath and remain calm.
This is just an error message. Now we will go through a few simple steps together to remove write protection on a USB flash drive. It's just technology and we can fix a lot of things.
Step 1 - Check your USB drive for viruses
Every time you connect a USB drive to your computer, you should automatically scan for viruses - especially if you used it on computers that you don't own.
Viruses often fill USB drives with their files - this can cause a message: write protected.
Depending on your antivirus software, it can be configured to automatically scan USB drives when they are connected.
If you don’t have such a tool, you’ll have to do the scanning manually, it’s not difficult.

If you find a virus, eliminate it using antivirus programs.
Most likely, where there is one virus, there are two or more. For such work, the free utilities Doctor Web and AVG have good recommendations.
Step 2 – Check the enclosure of the USB flash drive
Some USB flash drives are equipped with a mechanical switch that allows you to set them to the write-protected position.
This can be a very small slider switch that can switch on its own in a pocket or computer case (if it is an adapter).
If this is your situation, then simply move the switch to the open position and try copying the files again.

Today there are not many USB drives with such locks. So there's a good chance that this isn't your problem.
On the other hand, if this is not the question, then the following fixes are a little more complicated.
Step 3 - Make sure the disk is not full
If your USB drive is full, you may also receive a writing error message.
So find your USB drive, right-click on it and select Properties.
This will give you a nice pie chart of how much is being used and how much free space is available on your drive.

Step 4 – File System
Make sure you are not using a file that is write-protected. Yes, you will receive a different error message, but perhaps you jumped to conclusions and thought that it was the entire USB flash drive that was blocked. This happens.

Right click on the file you are trying to burn and then on "properties" and the "security" tab.
You will now see several options at the bottom of this window, and one of them is read-only.
Make sure that the checkbox is unchecked or unchecked, and then click on the Apply button. You should now be able to write to this file.
Step 5 - Diskpart Command Line Utility
Have you ever worked on the Windows command line? This is not as scary as one might think, and as such it is the next logical step to remove protection.
Click on and enter the word CMD in the field: search for programs and files.
Now, click on the top (black icon). You will see the following window:

Enter the command “DiskPart” into it and press Enter. Diskpart is a tool that is built into Windows and is accessible through a command line utility. With it we can change the values associated with your USB drive.

Make sure this is really your USB drive. Now type the command Select Disk 3, assuming your USB is number 3, and hit Enter.
Now paste another command there - disk clear ReadOnly - and then click on Enter.
This way you have cleared any read-only attributes that might be on that USB drive.
Now close the command prompt and try writing to the USB drive again. If the protection continues to block access, move on.
Step 6 - to the registry
If none of the previous steps worked for you, then you should do something a little dangerous - enter the registry.
If you are not satisfied with the registry, you can proceed to step 7, to format the USB drive.
Or maybe have a friend who is a computer technician and will check the registry for you.
Try it yourself - it's a fairly simple registry change and you can do it.
Click on the Start menu and enter the command – regedit – in the Search programs and files field. You will see something like the picture in the box below.

Click on the icon at the top and the Registry Editor window will open. By clicking on the arrows next to the menu items, navigate to the branch
HKEY_LOCAL_MACHINE\SYSTEM\CurrentControlSet\Control\StorageDevicePolicies
and find the key named - WriteProtect.

If such an entry exists, right-click on it and click on "Edit".

Now, you will probably find that this parameter is set to 1. 1 means yes and 0 means no. Now change the value to 0 and click on the OK button.

Close Registry Editor, remove the USB device, and then connect it again. You should now be able to record to your USB drive. If not, then the disk will have to be formatted.
Step 7 - Format the USB Drive
WARNING: Make sure you have backed up all files and information on your USB drive. All data will be lost after formatting.
Formatting your hard drive is a last resort. However, it should make your USB capable of reading and writing.
Before formatting a USB drive, determine which file system it already has - NTFS or FAT32.
Usually the file system he already has will be best suited for him.
Now right-click on the selected USB drive and select “Properties” - there you will see the file system.
Close the Properties window, right-click on the USB drive again and select format.
This describes the built-in Windows tool, but sometimes it is advisable, especially if the integrated functions did not bring the desired result.

In the Formatting window, you have several options. You have already determined which file system you will format into.
I suggest unchecking the “Quick Format” checkbox. This will do more than just erase files.
If there are bad sectors on this USB drive, full formatting will throw an error.
Formatting shouldn't take much time. Of course, the larger the volume, the longer it will take.
Assuming you don't have a physical problem with the drive, it will be formatted and ready to read and write.
Conclusion
Sometimes the problem is simple and can be treated simply. Try the methods above as they are most often correct.
If the problem is deep and requires drastic action, make sure that this is true.
Now you have a lot of troubleshooting tools in your arsenal, you should be able to get your flash drives and drives back up and running, potentially saving you a pretty penny.
Of course, if you have any additional tips, we'd love to read them too. Good luck.
Keywords: usb sd, transcend, microsd, kingston, sandisk, cd, flash, qumo, microsd, apacer, verbatim, sdhc, psp, external, flash drive, dvd.
Sooner or later, every user of additional memory cards needs to format a microSD card.
There are several ways to do this efficiently and efficiently.
But first you need to figure it out what is microSD and how is formatting done??
What is microSD?
MicroSD is a small flash drive designed for portable equipment (mobile phones, digital cameras, MP3 players, etc.).
There is a type of equipment to which you can only connect an SD card. Often in this case, together or separately, special adapter sold, allowing you to make the transition from microSD to SD.
There are now four generations of cards:
- SD0 – from 8Mb to 2 Gb;
- SD 1.1 – up to 4 Gb;
- SDHC – up to 32 Gb;
- SDXC – up to 2 Tb.
History of MicroSD development
This memory card format was developed in 1999 by a joint effort of companies such as Panasonic, SanDisk and Toshiba.
Later, in order to “promote the idea,” a separate company was created to develop and improve this card format – SD Association.
Despite this early appearance, microSD cards only came into use in 2004. It was then that the company SanDisk introduced a standard for such cards, which was originally called TransFlash.
A year later, the name TransFlash was officially changed to MicroSD.
The device was initially doomed to great popularity, and they were right, especially now that it has very compact dimensions (20 * 21.5 * 14 mm and weighs 1 gram) and can store up to 128 GB of data inclusive, while having excellent data processing speed.
Areas of use
As mentioned above, cards of this format are used mainly for portable equipment. There are only three types of SD cards: microSD, miniSD and regular format SD cards.
Regular and miniSD cards Most often used in photo and video cameras. They store the footage.
The third kind used in more compact technology– mobile phones, smartphones, communicators, MP3 players and others.
Such devices are equipped with a special connector that supports this format. In this case, the memory card stores photos and video files, music and even many applications.
SD cards are used not only for use in portable equipment, but also in PCs as a storage medium. In the modern world, more and more laptops have a connector for connecting regular SD cards.
You can connect the device to desktop computers via a card reader. In this case, a special adapter is used for a microSD card, which is exactly the same size as a regular SD card.
Why formatting should be done
First of all, formatting allows you to completely free the memory card from the files on it. The second reason is the presence of viruses.
It is impossible to completely get rid of viruses by simply deleting virus files, so you will need to format the microSD.
And finally, the third reason is the slow operation of the card. By completely cleaning the drive, you can speed up its operation..
Formatting using standard Windows tools
You can format the card using standard Windows tools, but will this give the desired effect? After all, microSD cards often have write protection.
Therefore, it will be impossible to delete files. To check this, you can try formatting the flash drive without using programs.
To do this, insert the card into the card reader and wait for the computer to “see” it.
Then go to “My Computer”, find the required removable disk and right-click on it.
In the context menu that opens, select “Format”.

In the window that opens change the file system to FAT. If it is the default, then we do not change it. Then click the “Start” button.

Once the process is complete, your card remains empty. But not always completely.
After uploading new files and safely removing the removable drive, when you reconnect, it may turn out that the old files that were on the microSD before formatting and the new ones overlap each other.
In this case, independent formatting without third-party software will no longer help you. You will have to turn to various types of programs for help.
Let's look below at what programs can help us free up our SD card.
AutoFormat Tool

This program is very easy to use. It has a very small volume and is absolutely free. To use it you need to download the download archive.
You can do this on any site where you have it. You just need to enter its name in the search bar of your browser.
After downloading and installing, right-click on the shortcut and select “Run as administrator” in the context menu that opens.

After the program itself opens, in the utility window, select the arrow in the Disk Drive line and find the letter of your device.
Then put the marker on the SD item and press the “Format” button to start formatting.

After clicking the formatting button, another window will appear asking you to confirm the deletion of all files. Click “Yes” and start the formatting process.
Once completed, your card will be fully formatted and ready to use. If you can’t format the card using Windows, then this program will 100% help you.


This program is just as easy to use as the previous one. With her help You can format not only SD cards, but also USB drives and even RW drives.
The program is capable of performing low-level formatting, so it is used to clean any removable media.
This program also has a disadvantage - Once formatted using it, the data can no longer be restored.
The program can be downloaded for free on any website that has similar software.
After downloading the program easy to install and does not take up a lot of hard disk space, which is also a big plus. To format, proceed to the following steps:
1. Run the program as an administrator by right-clicking on the shortcut. In the window that opens, select the media that needs cleaning and click the “Continue” button.

2. In the next window, open the “LOW-LEVEL FORMAT” section and complete the action by pressing the “FORMAT THIS DEVISE” button. After this, we wait for the formatting to complete. This program has a slight delay in the cleaning process, so you will have to wait a bit.

SDFormatter

With this program you can perform better cleaning of the microSD card or any other removable media. It is more effective than standard Windows tools.
The developers of this utility are confident that this is the best formatting program.
To get started with this program, you should download and install it. You can download it from any site where it is available.
The program also absolutely free and does not take up much memory on your hard drive. After downloading, the program should be installed as usual and run as administrator.
After starting the program, a window opens in front of you, in which, in the “Drive” field, select the desired device to format.


After we have completed all the steps described above, just click the “Format” button and wait for the formatting to complete.
This method is quite simple, the program is easy to use and does not take up much space. It also doesn't use much RAM. Therefore, this method is very well suited for such purposes.

How to remove write protection on microSD
microSD write protection is activated automatically if the memory card is damaged. This is the worst thing for those who store extremely important documents and files on these media.
Why does the card stop working? There are five reasons for this:
1. Physical malfunction. It is possible that the card was damaged by mechanical force or simply got water on it. In this case, the card will be faulty.
2. The fault may also be in the logical system of the SD card. This happens after unsuccessful formatting and unsafe extraction.
3. Controller malfunction. The fault is displayed as follows: the disk is write-protected, the device does not see it or cannot read it.
4. Damage due to thermal or electrical influence. This occurs due to a malfunction of the device, poor quality or incorrectly installed components, due to which the device using the SD card may become warm or even overheat.
5. Media wear. Sooner or later, any device is subject to wear and tear. And microSD is no exception. After a certain number of recording and formatting processes, the card simply becomes unreadable.
So, you can remove the protection in several ways, which we will now discuss.
Removing protection through the Windows registry registry
First of all, you should check the registry register. It is possible that there is a blockage in it.
To do this, press the Win+R key combination, write “regedit” without quotes in the input line and press Enter.
A window will open in which you need to go through the following path: HKEY_LOCAL_MACHINE - SYSTEM - CurrentControlSet - Control - StorageDevicePolicies.

After that, select the WriteProtect file, which we open by double-clicking the left mouse button. In the file that opens, change all values 1 to 0, save the file and close the window.
Now you need to safely remove the drive and restart your computer. If this procedure does not bring any effect, there are other ways.
Physical unlocking
The process is very simple and takes half a minute. To do this, place the SD card on any flat surface with the contacts facing down.
On the left you can see a tiny “lever” - the locker - which must be moved to unlock.
There is no such lever on microSD, so you need to insert it into a special adapter and then move the locker on it all the way in the opposite direction.

Changing disk properties
If you need to copy data, but this does not work out, then you can do the following: connect the card to the PC, select the desired disk in “My Computer” and right-click on it with the right mouse button.
In the context menu, select “Properties”. A window will open in which you need to select the “Access” submenu, then select “Advanced settings” and check the “Share” sub-item. Save the changes by clicking the “OK” button.


Remove protection using a mobile device
Any portable device can remove write protection from microSD. To do this, go to the settings in the device menu and look for the formatting option.
There is a possibility that the device itself installed protection on the card, so it can remove it.
We remove the protection in the same settings and format the memory card. If you encounter any difficulties during the process, use the instructions.
conclusions
To summarize, I would like to say: there are many ways to format a card or remove protection from it. We have described the simplest and most accessible ones.
After all, it will be impossible to restore the data, and repairing the device will cost a pretty penny. Unless, of course, it can be repaired and you don’t have to buy a new one.
You can also format it using special programs. They have their pros and cons.
| Formatting method | pros | Minuses |
|---|---|---|
| AutoFormat Tool | Transcend proprietary program Completely formats memory cards Suitable for formatting USB media Free program. |
The program is old, which is why there is no developer support If the card is reflashed or artificially increased, the program returns the original capacity |
| Free program Simple interface and clear use Works with any storage device, even hard drive |
Inability to recover deleted files Format speed limit |
|
| SDFormatter | Supports all types of SD cards Simple and intuitive interface Free program |
There is no Russian language. At all Cannot be installed on removable drives |
| Windows Standard Tools | Does not require prior downloading and installation Formatting takes place in a couple of clicks |
The card can only be formatted visually (the files are not visible, but they remain) There is no way to recover the SD card |
In conclusion, we invite you to watch the video instructions on formatting microSD:
VIDEO: Formatting SD memory cards
Formatting SD Memory Cards
10 ways to format MicroSD: Write protection and how to remove it


