Have you ever seen what a broom looks like? plastic bottles? After reading the article to the end, you can make such a broom with your own hands.
Many summer residents who have garden paths made of concrete or made of paving slabs know how difficult it is to keep them clean. Especially after rain, when the soil from the shoes dries to the concrete. Only a hard broom will help here. These are available for sale, but they are not cheap. Alternatively, you can go to the nearest willow thicket and cut some twigs that will make a nice rustic broom.
Is it possible to make such a broom from plastic bottles? Let's try!
Making a broom from plastic bottles with your own hands
What exactly is a broom? The base to which flexible rods are attached. Nowadays it is almost impossible to find brooms or brushes made of natural bristles; mostly they are all synthetic. The same plastic in the form of a fishing line of varying thicknesses, attached to the base. This means that in order to make a broom yourself, you just need to get the same fishing line.
So, first we need the base of the broom. An old brush is perfect for this. The base can be plastic or wood.
If you don't have an old brush, it doesn't matter. It is enough to simply cut it out of a suitable board 25 - 30 centimeters long, 5 centimeters wide and one and a half to two centimeters thick.
First, you need to “shave” the old brush, that is, remove the remnants of the old bristles from it. This operation is easily performed with a regular stationery knife. The bristles are cut flush to the base. The fact that tufts of fibers remain inside the brush in the places where they are attached to the base does not bother us at all. The main thing is that the stubble does not stick out.

Now let's prepare the main raw materials for our future broom - plastic bottles.

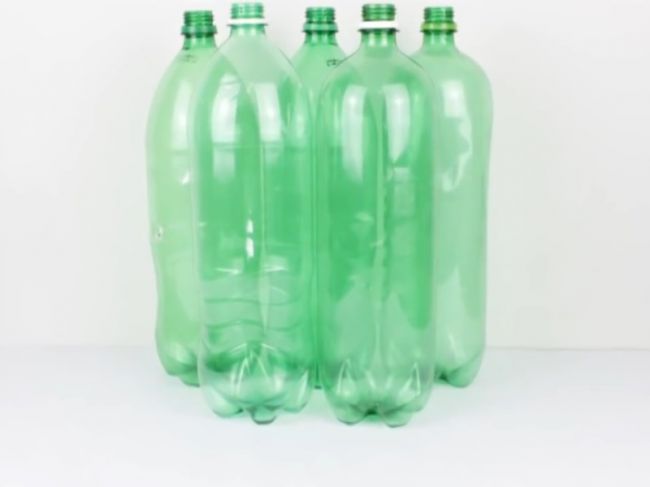
Plastic bottles of almost any capacity are suitable for this - from half a liter to three. The main condition is that it should not be wrinkled and that it should have a cylindrical shape in its central part, without figured grooves, depressions, etc. By the way, because of this, five-liter eggplants are practically unsuitable, since most of them have concentric shapes along their entire height grooves - stiffeners.
It should also be taken into account that the thickness of polyethylene varies from bottle to bottle. Beer bottles are made thicker than lemonade containers and mineral water. The thickness also depends on the volume of the container - the larger the volume, the thicker the walls.
So, take an empty plastic bottle, remove the label, wash the inside and dry it. Then we cut it with a stationery knife, as shown in the photo with red lines - we cut off the central cylinder and the neck with the stopper. The neck should be cut below the wide ring into which the cork rests. Unfortunately, the neck cone and bottom are not useful to us. Perhaps you can use them to make a funnel and a bowl for a cat.
Now, in fact, we need to get the fishing line to make the bristles of our future broom. To do this, you need to cut an even strip from the cylinder. You can, of course, do this with ordinary scissors, but this is a very tedious process. To speed it up and make it easier, it is enough to build a simple cutter.
We make a cutter for producing plastic strips from bottles

For the cutter we need a wooden block with a cross-section of approximately 4x4 centimeters and a length of about 20 centimeters. You can also use a piece of an old shovel handle. In the upper part of the block, use a hacksaw or jigsaw to make a vertical cut in the middle, 5-6 centimeters deep. In this cut, the workpiece cylinder will rotate during cutting. If you make a cut smaller, the bottle will jump out of the groove, and if you make a deeper cut, you will have to make great efforts when cutting.
Next, stepping back from Nizhny the edges of the slot are 5 millimeters, strictly perpendicular to the vertical, we make a horizontal cut with a depth of 18 millimeters. This is the place for the knife. A piece of blade from the same office knife is used as a knife. We break off a piece from the blade slightly shorter than the width of the block, insert it into the slot and secure it with a pair of screws. That's it, our cutter is ready.
Having cut the edge of the cylinder with scissors, we make the beginning of the tape. It is enough to cut a strip 8 - 10 centimeters long and 5 millimeters wide. Then we insert the beginning of the strip into the cutter UNDER the knife, and insert the bottle into the vertical slot ABOVE with a knife.
Then we take the cutter to left hand, and with the right one we simply pull the tip of the strip. The bottle rotates in the slot, and a neat, even ribbon emerges from under the knife. The main thing is to pull the tape smoothly, without jerking.
So, we turned the cylinder blank into a long polyethylene tape. By the way, I measured it out of interest: one two and a half liter bottle yields 17 meters of fishing line. From one and a half liter - about 11 meters.
But the ribbon blank is too soft for a broom and, moreover, continues to retain the ring shape of the bottle. To give the tape the characteristics we require need to heat it up. This can be done over a candle, blowtorch or gas burner. I used a regular kitchen gas stove.

Taking a piece of tape in your hands, as far as your arm span allows, you need to move it smoothly and at a uniform speed over the fire source.
When heated, the tape straightens, its edges fold inward, and in cross-section it no longer becomes flat, but semicircular. When heating, the main thing is to choose the optimal drawing speed. If you pull quickly, the tape will not have time to heat up and will not straighten out. If you delay, you can overheat it and even burn it out - it will simply melt and tear.
In the photo above you can see how soft and twisted the tape was on the left before heating, and how hard and straight it became on the right after. So we got an excellent, durable fishing line from a plastic bottle! Now all that remains is to assemble the broom.
The entire broom consists of individual panicles. Their number depends on the size of the base of the future broom. I needed nine brushes for the base of a standard mop.
We cut the finished fishing line with scissors into identical strips 20 centimeters long. We take two cut necks from PET bottles and glue them together. I’ll tell you how to cut the necks at the end of the article., there will also be some bonus for those who read it carefully.
Glue the necks together. For this purpose, ordinary glue such as “Moment-classic” or “BF” is suitable.
Attention! I highly do not recommend rigid glue such as “Super-moment” based on cyanoacrylate. Pay attention to the adhesive label: there should not be the inscription “Not recommended for PET”.

After the glue has completely dried, we fill the resulting sleeve with bristles - cut fishing line.
I didn’t count how many twigs fit into one sleeve, I just stuffed it tightly until the twigs could be inserted.
Instead of glue, you can also use sealant from a tube - once it hardens, it will securely fix the rods in the sleeve. We return the sleeve to the edge of the bundle and leave it until the glue or sealant has completely dried.

While our brooms are drying, we prepare the base: we screw the plugs to it with self-tapping screws, two self-tapping screws for each, placing them along the line of use of the broom. This way they are guaranteed not to vomit when sweeping. It should be noted that, due to the protruding wide rings on the bushings of the panicles, the plugs should not be screwed close to each other, but with some gap - 4-5 millimeters.
The plugs can be placed in one line - the broom will be thin, or you can do it in a zigzag, in which case the working thickness of the bristles will be almost twice as large.

When the panicles are completely dry, we can finally assemble our new broom. To do this, we simply screw the panicles into the plugs on the base.
All that remains is to attach the handle to the broom - and you can test it! By the way, I don’t recommend using ordinary light, thin-walled tubular handles from home mops: our broom turned out to be brutal, the load on the handle is appropriate, so it’s better to use a durable wooden handle.

Practical tests of the broom showed its excellent working qualities! It perfectly cleans hard surfaces - concrete, asphalt. In one or two passes, a broom removes even snow compacted by car wheels, which even a snow shovel cannot do.
Using bottles of different colors, you can get different color combinations in the panicles, and, most importantly, no neighbors will have such an exclusive look! I'm not even talking about the environment - they made a new broom and used empty bottles environment not polluted.
Now I return to the necks. They need to be cut from the bottle along the lower edge of the thick ring, which serves as a stop for the cork. But the polyethylene in this place is too thick to cut with a utility knife or scissors.
To speed up and facilitate the process, I used a simple device. I had to “sacrifice” one plug.
I drilled a hole in it with a diameter of 5 millimeters strictly in the center. I inserted a bolt of the same diameter into it, with the head inside the cover, secured the cover to the bolt with a nut, and did not forget to reinforce it with washers. Now it is enough to insert such a template into the drill chuck, screw the neck into it and you can easily cut off the excess polyethylene.

There are two cutting methods, diametrically opposed. In the first case, I turn on the drill and bring a hacksaw blade to the cut site. In the second case, on the contrary, I leave the cartridge motionless and cut off the excess with a jigsaw. Both methods are convenient and simple, everyone can choose their favorite one.

If the cut is not very even, it doesn’t matter; it can be easily sanded with a file or coarse sandpaper. This is also recommended for better gluing of the bushings to each other.
And now the promised bonus and interesting ideas
If, after making a broom, there are unused bottle caps left, do not rush to throw them away.
Two necks with stoppers glued together are an excellent container for all kinds of small things. The main thing is that it is sealed.

This means that you can store, for example, matches, tablets, salt, pepper in it - and they will remain dry. This container fits three AA batteries perfectly. This means that you will always have a NC for your country lantern or receiver. In order not to confuse which container contains what, you don’t even have to label them, just make them from necks and caps of different colors. Then you will definitely not forget that the white contains salt, and the orange contains matches...
And the last idea for today: many summer residents leave the key to their summer house under the floorboard, porch or on the door frame. But bad people also know about this and can take advantage of it in your absence. What if you put the key to the dacha in such a container and simply press it into the ground under the window? Yes, not a single thief will pay attention to the lemonade cork sticking out in the ground, and certainly not guess that it is not just an old cork, but a container with a key!
Conclusion
Someone will say: “It was worth working so hard for a cheap broom...”. I won’t object, but, firstly, the process of creativity and creating new ideas is important to me, and, secondly, having found such a non-trivial use for plastic bottles, having obtained a beautiful and durable tape from them, I have already begun to think where else it can be used in the countryside except as broom bristles.
Or something else, for example, a bird net. If you combine hard ribbons as carriers, and hang rustling soft spiral strips between them, you will get the cherries and serviceberries, not the blackbirds/sparrows. Wrap the gaps in the fence with the neighbor's property with such tape, and close the cracks under the fence from stray animals. Yes, even as reinforcement, put in concrete mortar, for example, when building paths or secondary buildings...
Some use half the bottles as pots for seedlings, microgreenhouses for them. There are also special craftsmen who cut bottles into rectangular fragments and build entire greenhouses from them. Or, having collected a certain number of bottles of the same shape and color, they make fences, and even full-fledged fences.
There are still many ideas, I will definitely tell you how I used old bottles in a new way at my favorite green dacha.
Manufactured in January 2014 in the city of Samara.
P.S. I already have excursions at work to see it and have several orders, but I refuse - it’s not interesting to repeat what has been done.
There are probably few people on the planet who have never heard of plastic bottles. They store and sell a wide variety of products - from drinks to meat.
It is probably impossible to imagine your life without plastic, which is a product of the chemical industry.
Everyone knows how quickly empty containers for drinks, yoghurts and other food products accumulate. The use of plastic bottles for storing and distributing carbonated drinks, including beer, is especially popular, since such containers have excellent tightness, you can use such containers more than once, being confident that the liquid will not leak during transportation.
Another use of plastic bottles is the ability to make various types of crafts out of them, which not only young people, but also practical people are eager to come up with.
You may not believe it, but you can even make a raft out of them! Due to their volume and tightness, if properly positioned, they can easily keep the ship afloat, but it is better not to go on a round-the-world trip across the seas and oceans using this type of transport.
Even a week would not be enough to list all the types of crafts that can be made from plastic bottles, but we will talk about only one of them, which will certainly be very useful to people who have their own dacha or garden plot.
Now you will learn how to make a broom from plastic bottles.
From eighteen two-liter bottles
Materials and tools
- Eighteen two-liter bottles.
- Any suitable stick for the cutting.
- A piece of wire.
- Nail.
- Hammer.
- Awl.
- Knife.
How to do
To do this, you will only need to devote two hours of your time.
Take seventeen plastic bottles and cut off the bottom, then cut them lengthwise to make strips about half a centimeter wide. Leave approximately six centimeters to the neck.
Do the same with all the other bottles except the eighteenth.
Cut off the necks of sixteen of the already cut bottles and leave them on one.


Now on the container with the uncut neck you put the rest, whose necks have been cut off.


From the last, untouched bottle, cut off the top, stepping back approximately fifteen centimeters from the top, and put it on all the other bottles that have already been put on.


Using an awl, pierce all the bottles in two places and thread a piece of wire through them.


Twist the ends of the wire. Trim the tip of the stick, which is intended for the handle, until it can be inserted into the neck, then insert it into the bottle.


Take a hammer and a nail, then nail the bottleneck to the inserted handle.
That's all.
How to make a broom from cut up plastic spirals?
To begin, you must cut the bottles into spirals by first cutting off the bottom and top. We won't need the bottoms anymore, but we'll come back to the necks.
From the resulting cylinders, cut spiral shavings approximately half a centimeter wide using a sharp knife or scissors.


The resulting spirals are still not ready in terms of rigidity to make a broom. To give them a solid elastic shape, the spirals must be treated with heat.
To do this, you can use a candle, a blowtorch, a gas burner or a gas stove in the kitchen.
Straighten the spiral in your hands and evenly pass it over the fire. Choose the right speed for running the tape; the final quality depends on this. When heated, the spiral becomes smooth and twisted lengthwise.
Cut the processed straight blanks into pieces twenty centimeters long.
Since such a broom consists of separately made small panicles, let’s start making them.
Cut the necks (for example, using a jigsaw) and glue them together in pairs. Use an adhesive that does not have the statement “Not recommended for PET” on its label. To avoid choosing for a long time, you can use the usual “Moment”.
After the glue has completely dried, tightly stuff the bushings with cut straight blanks.

To prevent the blanks from falling out, pour the same glue into the base and let it harden.


Plastic bottles are a wonderful and versatile material that serves many purposes. Not only do we store liquids in them, but the container can also be useful for all kinds of crafts. Some may be purely decorative, but others are useful in practice. One way to use plastic bottles is to turn them into a broom. This is a useful device that you need for your home or garden. Instead of buying a broom from the store, you can spend an hour or two making one.
Everyone has the material, but all you need is a simple set of tools. Let's find out how to make your own broom from plastic bottles step by step.
Tools and materials for work
It doesn’t take a lot of money to make a bottle broom with your own hands. All the components are in the house, so you don’t have to run to the store. The set of tools is simple, and even children can work with them. What will you need for the job? Here is this small list:
From such a set of simple things, you get this practical broom from a plastic bottle.

Now that you have everything you need, you can start creating your own product.
Creation technology
It will take you about an hour to produce, give or take. There is nothing difficult about the work. The main thing is to follow the instructions and do the work carefully. For your convenience we have made step by step instructions, which will help you. So, let's look at the creation step by step:
- Take the first bottle and a utility knife. It should be sharp. Cut off the neck from it, stepping back a few centimeters from the top.

- Cut off the bottom of the plastic container in the same way.

Advice! Work carefully to avoid injuring your hands. Plastic is a soft material, so it lends itself well to processing.
- Now you need scissors. Each broom has twigs or stems. Your job is to create these stems. Using scissors, start cutting the workpiece lengthwise, from bottom to top. The width of each strip is approximately 0.5-1 cm. Do not cut it to the very end. Move just above the middle, leaving about 6 cm at the top.

- Process the remaining bottles in exactly the same way. Leave only two of them untouched. Please note that the more products there are, the thicker the broom bundle will become. It will cope with cleansing more effectively.

- So, at this stage you have 3 or 5 pieces ready (depending on how much you initially stocked), the neck of which is cut off, and the rest is cut into strips. You also have two untouched plastic bottles. Take one of them and, without cutting off the neck, do the same as with the rest.

- Your bottle broom is almost ready. Take the blank with a neck and begin to insert it one by one inside each part made without a neck. The product with a neck will fit freely into the prepared hole. Install all workpieces completely.

- Basically, the bottom part is ready. It remains to be bent (flatten) to give shape. But we will not stop there, but will improve it to make it beautiful and practical. Take the remaining bottle, preferably one with a high neck, and cut it in half with a utility knife. We only need the top part.

Advice! Don’t throw away the lower part; you can use it to make a tabletop or hanging pot, a container for pens, an owl or a ladybug.
- In the desired part, use scissors to make two cuts on each side, opposite to each other. Make the cut approximately to the middle of the plastic part.

- The finished part needs to be placed on a blank made from the remaining bottles.
- Using a large nail (50 or 100 mm), sew the product in two places in a horizontal plane. You can use an awl. It takes effort. Insert the wire into the holes formed and firmly tie all the layers together. It should turn out as shown in the photo.

- That's all, the product is almost ready. All that remains is to attach the stalk to it. The stick should fit into the neck of the bottle not loosely, but tightly. To control the thickness, trim it using a regular knife.
- When the stick enters the neck, all that remains is to secure it with nails or screws so that it does not fall out or spin. The nails will securely secure the handle, and the broom will be one piece.
- For reliability, it is better to use not one, but two or three nails. They need to be driven into the neck with the stem inserted. For better fixation, you can use small self-tapping screws.

You have successfully created a device. A do-it-yourself broom made from plastic bottles will do the job perfectly. You can use it to sweep the yard, room, paths, etc. Create several brooms and surprise your friends with your skills. To make it clearer how to properly make a broom from plastic bottles, check out this video.
How can you use regular plastic bottles? They serve not only to store liquid drinks in them, sometimes we make crafts from plastic bottles that are useful in everyday life. Needlewomen and handicraftsmen never miss the chance to turn some unnecessary item into a practical and necessary thing in the household. One of these useful products is a broom made from a plastic bottle, created with your own hands.
Useful homemade product in everyday life
Why might you need such a homemade broom? Naturally, such a broom will not be useful for cleaning rooms, since it will not be able to efficiently collect fine dust or crumbs. But it will be very useful in the garage, in the country, in the yard. This broom is most often used to remove large debris. It is convenient to sweep up dry leaves in the autumn.
What you need to make a broom from plastic bottles
First of all, let's prepare everything that may be useful to us in our work.
The main material is approximately 6 plastic bottles. Depending on how fluffy you plan to make the panicle, you can use more or less. Some people are happy with a broom of four bottles, while others need eight. Usually two-liter or one-and-a-half liter plastic containers are used: the larger the displacement, the longer the broom's rods will be.
To make a handle, you can take a smooth wooden stick or use a plastic tube. Determine the length of the holder at your discretion, but it is better to make its thickness such that it matches the diameter of the neck of the bottle.
Thick rope, such as string or twine, can also be useful.
You should take care of the tools that may be needed in your work. They will be easy to find in any home. These are sharp large scissors, an awl, nails and a hammer.
How to make a broom from a plastic bottle?
Making such a thing with your own hands is as easy as shelling pears. It seems that even a child can cope with this task. So, we have already prepared everything we need, now let's find out how to make a broom from plastic

- Using sharp scissors, cut off the bottom of each prepared container.
- We cut the entire lateral surface to the point of narrowing into strips 1-2 cm wide. The rigidity and elasticity of the broom will depend on their thickness.
- Now it's time to cut off the neck of all but two bottles.
- We take one blank with a neck and put all the other plastic “skirts” on it. Lastly, we attach the second bottle with a neck.
- The next step is to crumple our broom so that it becomes flat.
- We make several holes with an awl and stretch a rope through them so that the broom does not fall apart. Instead of twine, you can use flexible wire.
- We have an almost finished panicle. But now there is nothing to take it for. The two necks from the inner and outer bottle are what the handle will be fixed to.
- We thread the holder through and secure it with several nails. Try to fix it as securely as possible so that the broom does not dangle during use.
As a result, we got a wonderful broom made from a plastic bottle. You can make this necessary thing with your own hands in 20-30 minutes.
The disadvantage of this product is that it is short. With intensive use, the broom quickly softens and becomes ineffective. But this is not so scary, given the ease of its manufacture and the availability of materials.
Other useful crafts from plastic bottles
You can simply throw away a plastic bottle, many do so, but you just have to want it, and this unnecessary thing turns into a useful thing.

Most often, plastic containers of various sizes are used in gardening. Flower growers use them as flowerpots for plants. Vegetable growers grow seedlings in half-liter bottles cut in half. They can save the trunk of young trees from attacks by wild animals and cover cuttings to root growth. It’s easy and simple to make a kind of lampshade that protects light bulbs outside from rain. If you pierce a plastic bottle in several places with an awl and put it on a watering hose, it will serve as an excellent sprayer when watering.
Using imagination and ingenuity, you can definitely find an original use for a plastic bottle.
For some, a plastic soda bottle becomes trash after drinking the sweet water. And for a practical and creative person, plastic is an endless source of inspiration. Today I will show you how to make a broom from plastic bottles with your own hands. The plastic broom is very light and durable and will serve you for a long time.
Description of work
For production we will need different sizes. The density and, consequently, the strength of the broom will depend on the number of bottles. Try to take bottles with the same top part for ease of assembly.

Bottles need to be prepared. To do this, you must first cut off the bottom and top parts of the bottle. But for one smaller bottle we cut off only the bottom and leave the top. Then we cut the blanks into strips with a width of 0.5 to 2 cm.  We will also need to prepare a couple of lids for assembly. To do this, cut off a threaded ring from the cap of a plastic bottle, and make a hole in the white cap of the jar.
  Next we assemble the broom. We string all the other cut pieces onto the smallest bottle.
  We secure the broom - put the white lid on top and screw on the ring.
  Next step– flatten our workpiece. Using a nail heated over a fire, we make holes on the whisk itself, and make one hole on the neck of the bottle. For strength, you need to fasten the broom. I did not find any wire at hand and secured the entire structure with plastic rope.
  The last thing left is to make a cutting. I had a suitable stick, but it turned out to be smaller in diameter. I had to increase the diameter using electrical tape. At the very last stage, you need to screw the broom handle with self-tapping screws. And ready!


