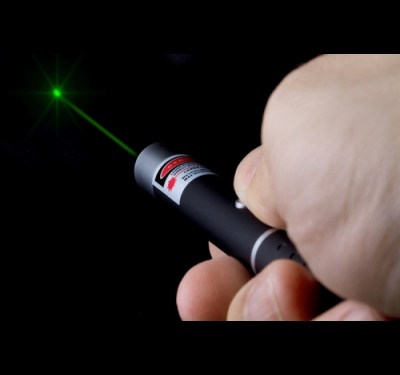
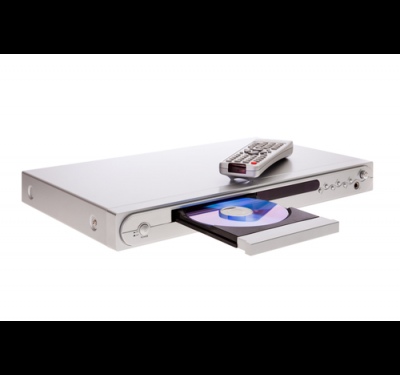
Is it possible, and how to make a laser at home, with your own hands? Which of the male population, no matter whether boys or adults, has not once dreamed of assembling his own personal "laser sword", like the heroes of the "Jedi" in the movies? Remember laser pointers, which have gone out of fashion for a long time, their power, of course, can hardly impress anyone. But this, of course, does not mean that they cannot serve you in the end. Of course, a real, laser sword will not work out of them, but a laser of some power may well work out. In order to make a laser at home You will need the following items and tools:
- laser pointer
- soldering iron, wires
- a DVD drive with a working laser (it’s easy to buy a cheap broken DVD on the market if you can’t find one at home)
- flashlight (small, with two AA batteries)
Many people are aware of the possibilities of laser technologies and their benefits. They are used not only in industry, but also in cosmetology, medicine, everyday life, art and other areas of human life. However, not everyone knows how to make a laser at home. But it can be built from improvised materials. To do this, you will need a non-working DVD drive, a lighter or a flashlight.
Before at home, you need to collect all the necessary elements. First of all, you need to disassemble the DVD drive. To do this, all the screws that hold the top and bottom covers of the device are unscrewed. Next, the main cable is disconnected and the board is unscrewed. Protection of diodes and optics must be cracked. The next step is to remove the diode, for which pliers are usually used. In order for static electricity not to damage the diode, its legs must be tied with wire. Remove the diode carefully so as not to break the legs.
Next, before making a laser at home, you need to make a driver for the laser, which is represented by a small circuit that regulates the power of the diode. The fact is that if the power is set incorrectly, then the diode can quickly fail. As a power source, you can use finger batteries or a battery from a mobile phone.
Before you make a laser at home, you need to take into account the fact that the burning effect is provided by optics. If not, then the laser will just shine. As optics, you can use a special lens from the same drive from which the diode was taken. To correctly set the focus, you must use a laser pointer.
In order to build a regular pocket laser, you can use a regular lighter. However, before you make a laser from a lighter, you need to know the construction technology. It is best to purchase a quality incendiary element. It needs to be disassembled, but the parts should not be thrown away, as they will still be useful in the design. If there is gas left in the lighter, it must be released. Then the insides must be machined with a drill with special nozzles. Inside the body of the lighter there is a diode from the drive, several resistors, a switch and a battery. All elements of the lighter must be installed in their places, after which the button that used to light the flame will turn on the laser.
 However, for the construction of the device, you can use not only a lighter, but also a flashlight. Before you can make a laser from a flashlight, you need to take the laser block from the CD drive. In principle, the structure of a homemade laser in a flashlight does not differ from the laser device in a lighter. It is only necessary to take into account the power supply, which almost never exceeds 3 V, and it is also desirable to build an additional voltage regulator. It will increase the life It is very important to consider the polarity of the diode and the stabilizer.
All the assembled filling must be placed in the body of the disassembled flashlight. Previously, not only the inner part, but also the glass is removed from the flashlight. After installing the laser unit, the glass is installed in place.
Who among teenagers and most adults, male, does not dream of building their own laser sword? Laser pointers have long gone out of fashion, their power is hardly capable of impressing anyone. However, this does not mean that they will not serve you in the end. A laser sword will not come out of them, but a quite powerful laser will turn out.
Instruction
To make a laser at home, you will need a laser pointer, a DVD drive with a working laser, a flashlight, wires and a soldering iron. You can buy a broken DVD at the radio market, if there is none on the farm.

In the first step, you need to remove the laser diode from the DVD. This is a long and painstaking process. When you open the DVD, you can easily find a carriage that moves along two rails. Unscrew the carriage carefully. You will have a lot of screws on the way, you need to remove them without haste, since the laser diode does not tolerate shaking and bumps. When you remove it from the carriage body, hold it gently and carefully.

The second stage is the replacement of its native diode in the laser pointer with the one removed from the drive. This is necessary to make the laser more powerful. The fact is that inside the pointer there is a low-power laser diode, while in DVD the laser is a class higher. The laser pointer can be unwound into two parts. The diode is installed at the top. You need to get the native diode and emitter. After that, you need to install the diode from the DVD into the case of the upper part. It is best to put it on an adhesive base.
A handmade laser cutter is useful in every home.
Of course, a home-made device will not be able to gain the great power that production devices have, but still it will be possible to get some benefit from it in everyday life.
The most interesting thing is that you can make a laser cutter using old unnecessary items.
For example, using an old laser pointer will allow you to make a laser device with your own hands.
In order for the process of creating the cutter to progress as quickly as possible, it is necessary to prepare the following items and tools:
- laser type pointer;
- rechargeable flashlight;
- an old CD / DVD-RW writer, possibly out of order - you will need a drive with a laser from it;
- soldering iron and a set of screwdrivers.
The process of making a cutter with your own hands begins with disassembling the drive, from where you need to get the device.
Extraction must be done as carefully as possible, while you will have to be patient and be careful. The device has many different wires with almost the same structure.
When choosing a DVD drive, you need to consider that it is a writer, since it is this option that allows you to make recordings using a laser.
Recording is done by evaporating a thin metal layer from the disc.
In the process of reading, the laser functions at half its technical capacity, lightly illuminating the disc.
In the process of dismantling the upper fastener, the eye will fall on the carriage with the laser, which can move in several directions.
The carriage must be carefully removed, carefully remove the connectors and screws.
Then you can move on to removing the red diode, due to which the disk is burned - this can be easily done with your own hands using an electric soldering iron. The extracted element should not be shaken, let alone dropped.
After the main part of the future cutter is on the surface, you need to make a carefully thought-out plan for assembling a laser cutter.
In this case, it is necessary to take into account the following points: how best to place the diode, how to connect it to a power source, because the writing device diode requires more electricity than the main element of the pointer.
This issue can be resolved in several ways.
To make a hand cutter with more or less high power, you need to get the diode in the pointer, and then change it to the element extracted from.
Therefore, the laser pointer is disassembled as carefully as the DVD burner drive.
The object is untwisted, then its body is divided into two halves. Immediately on the surface you can see the part that needs to be replaced with your own hands.
To do this, the native diode from the pointer is removed and carefully replaced with a more powerful one; its secure fastening can be done using glue.
It may not be possible to immediately remove the old diode element, so you can carefully pick it up with the tip of a knife, then gently shake the body of the pointer.
At the next stage of manufacturing a laser cutter, you need to make a case for it.
For this purpose, a flashlight with rechargeable batteries is useful, which will allow the laser cutter to receive power supply, acquire an aesthetic appearance, and ease of use.
To do this, it is necessary to introduce a modified upper part of the former pointer into the body of the flashlight with your own hands.
Then you need to connect charging to the diode, using the battery located in the flashlight. It is very important to accurately establish the polarity during the connection process.
Before the flashlight is assembled, it is necessary to remove the glass and other unnecessary elements of the pointer, which can interfere with the laser beam.
At the final stage, the laser cutter is prepared for use.
For comfortable manual work, all stages of work on the device must be strictly observed.
To this end, it is necessary to check the reliability of fixation of all embedded elements, the correct polarity and evenness of the laser installation.
So, if all the assembly conditions outlined above in the article have been exactly observed, the cutter is ready for use.
But since a home-made hand-held device is endowed with low power, it is unlikely that a full-fledged laser cutter for metal will turn out of it.
What a cutter will ideally be able to do is make holes in paper or plastic wrap.
But it is impossible to direct a laser device made by oneself at a person, here its power will be enough to harm the health of the body.
How can I amplify a homemade laser?
To make a more powerful laser cutter for metal work with your own hands, you need to use devices from the following list:
- DVD-RW drive, it doesn't matter if it's working or not;
- 100 pF and mF - capacitors;
- 2-5 ohm resistor;
- 3 pcs. rechargeable batteries;
- soldering iron, wires;
- collimator;
- steel lantern on LED elements.
The assembly of a laser cutter for manual work occurs according to the following scheme.
With the use of these devices, the driver is assembled, and subsequently, through the board, it will be able to provide a certain power to the laser cutter.
In this case, in no case should the power supply be connected directly to the diode, as the diode will burn out. You also need to take into account that the diode should not be powered by voltage, but by current.
A body equipped with an optical lens is used as a collimator, due to which rays will accumulate.
This part is easy to find in a special store, the main thing is that it has a groove for installing a laser diode. The price of this device is small, approximately $ 3-7.
By the way, the laser is assembled in the same way as the cutter model discussed above.
A wire can also be used as an antistatic product; a diode is wrapped around it. After that, you can proceed to the layout of the driver device.
Before proceeding to the full manual assembly of the laser cutter, you need to check the driver is working.
The current strength is measured using a multimeter, for this they take the remaining diode and take measurements with their own hands.
Taking into account the speed of the current, select its power for the laser cutter. For example, in some versions of laser devices, the current strength can be 300-350 mA.
For other, more intensive models, it is 500 mA, provided that another driver device is used.
To make a home-made laser look more aesthetically pleasing and convenient to use, it needs a case, which can be used as a steel flashlight that operates on LEDs.
As a rule, the mentioned device is endowed with compact dimensions that allow it to fit in a pocket. But in order to avoid contamination of the lens, you need to purchase or sew a case with your own hands in advance.
Features of production laser cutters
Not everyone can afford the price of a production-type laser cutter for metal.
Such equipment is used for processing and cutting metal materials.
The principle of operation of a laser cutter is based on the generation of powerful radiation by a tool, endowed with the property of vaporizing or blowing out a metal molten layer.
This production technology, when working with different types of metal, is able to provide a high quality cut.
The depth of material processing depends on the type of laser machine and the characteristics of the processed materials.
Today, three types of lasers are used: solid-state, fiber and gas.
The device of solid-state emitters is based on the use of specific types of glass or crystals as a working medium.
Here, as an example, low-cost installations operated on semiconductor lasers can be cited.
Fiber - their active medium functions through the use of optical fibers.
This type of device is a modification of solid-state emitters, but according to experts, the fiber laser is successfully replacing its counterparts in the field of metalworking.
At the same time, optical fibers are the basis of not only the cutter, but also the engraving machine.
Gas - the working environment of the laser device combines carbon dioxide, nitrogen and helium gases.
Since the efficiency of the emitters under consideration is not higher than 20%, they are used for cutting and welding polymer, rubber and glass materials, as well as metal with a high degree of thermal conductivity.
Here, as an example, you can take a metal cutter manufactured by Hans, the use of a laser device allows you to cut copper, brass and aluminum, in this case, the minimum power of the machines only outperforms its counterparts.
Drive operation diagram
Only a desktop laser can be operated from a drive; this type of device is a portal-console machine.
The laser unit can move along the guide rails of the device both vertically and horizontally.
As an alternative to the portal device, a flatbed model of the mechanism was made, its cutter moves only horizontally.
Other existing versions of laser machines have a desktop equipped with a drive mechanism and endowed with the ability to move in different planes.
At the moment, there are two options for controlling the drive mechanism.
The first provides movement of the workpiece due to the operation of the table drive, or the movement of the cutter is performed due to the operation of the laser.
The second option involves the simultaneous movement of the table and cutter.
At the same time, the first management model is considered to be much simpler in comparison with the second option. But the second model is still distinguished by high performance.
A common technical characteristic of the considered cases is the need to introduce a CNC unit into the device, but then the price for assembling a device for manual work will become higher.
HELLO DIMONOVTS!!!
Today, I will tell YOU how to make a powerful laser pointer at home.
To do this, we need 17 things:
1- faulty (dead) DVD drive, speed 16-22X (the higher the speed, the more powerful the laser in it is)
PRICE-50-300R
2- cheap Chinese flashlight (for 3 batteries)
PRICE-50R
3- cheap laser pointer "double-barreled" (laser pointer + LED flashlight)
[ 
PRICE-50R
4- soldering iron, power 40W (W), voltage 220V (V) with a thin tip.
5 - fusible solder (type POS60-POS61), pine rosin.
6 - a piece of one-sided fiberglass with dimensions of 35X10mm
7- ferric chloride (sold in radio stores) price-80-100R
8- tool (tweezers, magnifying glass, small screwdrivers, pliers, long nose pliers, etc.)
9- here are the terminal petals

(sold in any electrical store) cost from 10-35R
10 tube of super glue
11- alcohol (can be found in a pharmacy)
12 laser printer
13- page of any glossy magazine (necessarily glossy, smooth. You can also use photo paper)
14- electric iron (we take at home. Mom, sister, grandmother, wife, until they see)
15- radio components (you can get some from the dead drive itself, in particular the Schottky diode, resistors, capacitors)
list of parts and their rating (ALL PARTS SMD, i.e. surface mount (save space))
chip LM2621
R1 needs to be selected .. the current on the Laser diode depends on it. I have 78kΩ current 250-300mA NO MORE!!! otherwise it will burn!
R2 150kOhm
R3 150kΩ
R4 500 Ohm
C1 0.1uF ceramic, e.g. K10-17
C2 100uF 6.3V any
C3 33uF 6.3V, preferably tantalum.
C4 33pF ceramic, e.g. K10-17
C5 0.1uF ceramic, e.g. K10-17
VD1 any 3 ampere. For example
1N5821, 30BQ060, 31DQ10, MBRS340T3, SB360, SK34A, SR360
L1 on the photo you can see how it looks .. and so, 15 turns on a suitable ring or ferrite frame. You can disassemble either a computer power supply or an energy-saving light bulb, or a charger for a mobile phone, including a car charger for a mobile phone.
All this is not so important, the microcircuit will set everything as it should.


