The mini tractor is an indispensable agricultural equipment for cultivating the land, planting seeds and harvesting. Especially this technique is in demand in the village, among the owners of large personal plots. The cost of mini tractors in the factory version is quite high. Even the latest Chinese-made technology is sometimes not affordable for everyone. Therefore, more and more home craftsmen are trying to make a mini tractor on their own, using improvised materials.
If you decide to assemble a mini tractor with your own hands, then first of all you need to pick up a power unit for it. The latter is often used ZID engine. This is a four-stroke unit with a volume of 0.52 liters. and a capacity of 4.5 l / s, which is quite suitable for processing 2-3 hectares of land. The engine is easy to maintain, so it is often installed on various home-made equipment, moreover, it is easy to buy it on the Internet.
Another option for homemade is . This is a two-cylinder unit with a capacity of about 12 l / s and a volume of 0.42 liters. Although this type of motor has long been discontinued, there are a large number of offers on the Internet for the sale of this unit. It can be bought for approximately 5,000 - 8,000 rubles.

Often, in the manufacture of homemade tractors, craftsmen use motors from cars. For example, you can meet mini tractors with an Oka engine.


This engine has a power of 29.3 l / s and a volume of 0.649 liters. In fact, this is a VAZ engine (VAZ 21083), only in a lightweight version, since it has 2 times less weight. Distinctive feature engine from Oka is a low consumption of gasoline and high efficiency.
The more expensive option is engine from "Zhiguli". The motors of the VAZ car line have an engine power of 59 l / s (VAZ 2101) and higher. A tractor with a VAZ engine is a fairly powerful unit that can cope with almost any agricultural work.


It is easiest for owners of walk-behind tractors to make a mini tractor for the household, since this unit already has all the necessary control units. It remains only to make a suitable frame, and the tractor is ready.

What to make a frame
The assembly of a mini tractor always begins with the manufacture of the frame. The frame of the minitractor acts as a base on which all components and parts of this unit are fixed. The frame should be strong enough and at the same time not very heavy. It is usually made from metal corner, profile pipe or channel. Parts are connected by welding. The frame can be one-piece or two-piece.
one piece frame the easiest to make. It is enough to weld a rectangle from a channel or a corner. Frame dimensions are calculated based on the dimensions of the engine, gearbox and other components.

Also, 4x4 mini tractors are very popular among homeowners. These are four wheel drive tractors. with broken frame. The word "all-wheel drive" means that the unit is driven by both axles, front and rear. An example of such a frame made from channel No. 10 is shown in the following photo.

Frame fracture knot most often they are made from the cardan shaft of a car, for example, from GAZ-52.
The main advantage of a homemade tractor with a breaking frame is the small turning radius of the unit. Due to its high maneuverability, the fracture minitractor is successfully used in small areas where it will be difficult to turn a minitractor with a solid frame.
Below are drawings of a frame connected by a hinge.


What to make a chassis
To assemble a mini tractor, you need to prepare its chassis. It includes wheels, front and rear axles, transmission elements.
When choosing wheels for a mini tractor the intended use of the latter should be taken into account. If the unit is being built for the transport and pulling of goods, then a disk diameter of 16 inches will suffice. When using the tractor in the field, it is better to use more massive wheels with discs with a diameter of 18 to 24 inches.
If the drive axle in your tractor is only the rear, then front beam is made simple enough.

To make a homemade front axle, as well as its rear counterpart for all-wheel drive, you will need to take 2 identical chassis units, for example, from a VAZ or Moskvich car, and shorten them. How to shorten the bridge from a VAZ car can be found in this video.
Important! Bridges must have the same gearboxes, with the same gear ratio. Otherwise, the front and rear wheels will rotate at different speeds when the tractor is moving.
Since the bridges already have a built-in mechanism for transmitting rotational motion to the wheel axle, it is not necessary to make a home-made gearbox.
Benefits of installing hydraulics
Hydraulics is installed on a minitractor in order to ensure the operation of some of its mechanisms and facilitate the management of this unit. The unit with installed hydraulics has its advantages.
- The car becomes easy to control. The steering wheel can be turned with almost no effort with one hand.
- Hydraulics makes it possible to use various attachments.
- The use of hydraulics allows you to upgrade the braking system. Thanks to the hydraulic cylinders installed on the unit, the braking of the unit occurs instantly.
You can make hydraulics on a mini tractor if you purchase a ready-made system in a store in advance or use parts from old agricultural machinery.
Important! When installing hydraulics on a mini tractor, it should be borne in mind that some of the engine power will be spent on servicing this unit. Therefore, for tractors with low-power engines, installing hydraulics will not bring any benefit.
What is the VOM for?
The power take-off shaft (PTO) is designed to drive various agricultural mechanisms connected to a mini tractor, for example, various cutters for tillage, potato diggers, mowers, snow blowers, etc.

PTO can be like dependent and independent. In the first case, the shaft is driven by a transmission that transmits rotational motion to the wheels. As soon as the wheels stop, the PTO stops turning. An independent PTO receives rotation from the engine crankshaft. Therefore, the higher the engine speed, the faster the shaft rotates.
In addition, there are tractors with PTO synchronous type. The speed of rotation of the synchronous shaft directly depends on the gear ratio of the transmission of the moving tractor. Synchronization of movement and rotation is required when the unit is working with sowing equipment.
Making a three-point hitch
The hitch is used for connecting additional equipment to the tractor, for example, a plow.

The hinge must be movable both in the horizontal plane and in the vertical. In the first case, mobility helps to reduce the overhang of the nozzle when taxiing. Vertical movement of the suspension is required to lower the equipment into working condition or raise it to the transport position.
A hitch on a minitractor is made from various parts taken from old agricultural machinery. It is quite difficult to make a description of how to make a three-point hitch at home. Therefore, it would be more correct to use the following video, which indicates the dimensions of all parts of the fixture.
Selection and installation of brakes and clutch
Brakes must be installed on the rear wheelset. Easiest to take ready-made blocks from the UAZ car. The brake pads must be installed on the wheel disks, and the control should be brought to the pedal or lever installed inside the cab.
To install the clutch on a homemade mini tractor, you can also use a ready-made option from any car. For example, you can use belt clutch from Moskvich or UAZ.
The clutch unit is attached to the gearbox, also taken from any car. You can see how the clutch is installed in this video.
Steering installation
It is quite difficult to make a steering mechanism on your own, and in principle it makes no sense, since all the parts can be taken from any car.

When installing the steering mechanism, the steering shaft with the gear is connected to the steering arms, which are on the steering knuckles mounted on the front beam (the manufacture of the beam was discussed above).
How to make a cabin for a mini tractor
If in the summer it is possible to work on a minitractor even without a cab, then with the onset of the autumn-winter period, the use of the unit becomes rather uncomfortable or even impossible. Therefore, craftsmen are trying to assemble tractors with cabs in order to use this technique all year round.
Cabin for homemade equipment is made sheet steel according to a pre-prepared drawing. As a basis for calculations, you can take the cab from the MTZ tractor. The following photo shows a drawing, based on which you can make a cabin yourself.

Advice! If the dimensions of the cabin on the drawing do not fit the dimensions of your mini tractor, then they must be changed. But the main thing to consider when correcting dimensions is the size of the windshield and the height of the cab. Its ceiling should be 25 cm higher than the head of a person sitting in the cabin.
The cabin is made as follows.

In general, in order to better understand how a mini tractor is made with your own hands, you can watch this video, a kind of beginner's guide.
The nuances of manufacturing a caterpillar tractor
Homemade tracked mini tractors are a technique, main feature which is high maneuverability and good maneuverability. Also, a tractor on tracks creates minimal pressure on the soil, which cannot be said about its wheeled counterpart.
To make a crawler mini tractor, you will need the following structural elements.
- Frame. It is made from a profile pipe or channel.
- Engine. For a tracked mini tractor, it is better to use a diesel engine.
- Main bridge. As in the manufacture of a wheeled tractor, a ready-made axle from an old car can also be used for a caterpillar unit, which should be shortened.
- Transmission. The ideal option there will be a box from GAZ-53.
- Clutch. A clutch unit from a GAZ-52 is suitable.
- Caterpillars. They are made from tires from the wheels of large-sized equipment, for example, from a tractor.
For making caterpillars you need to take 2 tires from the tractor and cut off the side parts on them. Then these tires are put on the wheels mounted on the frame, as shown in the next photo.
To make the tractor turn, on the rear axle you need to install a differential that will disconnect the right or left wheel from the drive. Also, each wheel must be equipped with a brake controlled separately. When you press the brake pedal and switch the differential, one wheel of the drive axle stops, while the opposite one continues to rotate. Due to this, the tractor turns in the right direction.
Many farmers are interested in how to make a tractor from a Zhiguli with their own hands. Farms or owners of large plots of land need the help of agricultural machinery. However, not everyone has a large amount, because a factory tractor costs a lot of money.
In many farms you can find old Zhiguli, which have already served their time, but have a chance for a second life. On the basis of this machine, you can create a home-made tractor from the Zhiguli, which will have the same characteristics as the purchased copies. And the motor can be taken from the VAZ 2109 or VAZ 2106 model.
How to make a mini-tractor from Zhiguli with your own hands
Consider how to make a homemade tractor from a VAZ, what materials and tools you will need. First of all, you need to complete the drawings and diagrams of all structural units. To make a mini tractor with your own hands, you need the exact dimensions of the parts and calculations. Each component must be listed separately. And you need a drawing with a tractor assembled. It depends on the diagrams and drawings made, what will be a home-made tractor with a VAZ 2106 engine.

When working on a drawing, the following points should be considered:
- it is necessary to determine the location of the gearbox;
- the engine must be covered with a protective casing;
- where will the fuel tank be installed;
- if you shorten the tractor frame, then a home-made mini tractor from the VAZ will consume less fuel;
- front suspension should be reinforced.

If you decide to create a tractor from a VAZ 2109 or VAZ 2106, then as a result of the work done, you will get a fairly powerful unit that will cope with many agricultural works and help take care of the garden and plants.
So, they proceed to the very development and assembly of a home-made tractor based on the VAZ. A mini-tractor can be made with an engine from a VAZ 2019 or VAZ 2106, borrow additional parts from other models of machines.
For example, the gearbox can be borrowed from the GAZ-53, the rear wheels can be taken from the MTZ-82 tractor, but the front wheels can be removed from an already inoperative or unnecessary walk-behind tractor, or a motor-cultivator.
You can also buy them in the store. From any Zhiguli model you can take steering and the driver's seat, or make it yourself. The front and rear axles are taken from the Zhiguli unit.
See » Characteristics and device of the universal tractor MTZ-80

Stages of work on the manufacture of homemade
The next thing to do is to highlight the individual stages of work:
- The kinetic scheme is an important stage in the creation of a mini-tractor with a VAZ engine.
- Creating a tractor frame. It can be made from channels and corners. All frame joints are carefully welded. Now you should inspect the metal for rust and cover the frame in several layers with a metal primer.
- Starting to finalize the running gear of the project. It is imperative to check the brake system, if necessary, replace its components.
- Wheel mounting. If you are going to put large wheels in diameter, then you need to take care of the axles and brakes by redoing their device.
- After that, the engine is mounted on a previously prepared frame, which is already completely dry after painting with a primer, a protective cover for a VAZ minitractor is welded and mounted.
- Install the seat, steering and create platforms for mounting attachments.

But you can not make platforms for hanging, but immediately make a snow plow. But you still need to attach a 50 kg counterweight to the front so that the unit does not roll over under heavy loads from the rear. You also need to attach headlights of your choice.
The hole for the trailer will also not be superfluous. With it, you can attach a cart or other cargo. The next important element, without which the mini-tractor from the VAZ 2106 will not move, is the battery. You can use an ordinary car battery. For it, you need to weld or make a storage department out of plywood. It is better not to attach the battery tightly in place, but to make it removable so that you can charge it. After all, it is much more convenient to take the battery and bring it to the garage than to drive the car. Think over every detail to create a mini tractor with a VAZ gearbox with a Zhiguli engine.
The situation can be saved by a tractor from a Zhiguli, assembled with your own hands, when a special machine is required to work in the field. This is especially felt by farms (both small and large), summer residents who have a plot of more than 10 acres. It is worth noting that in the villages there are often old cars that have outlived their usefulness. However, they can be brought back to life in a new role.
A self-made tractor from Zhiguli allows you to solve absolutely all tasks in the field and does not require special spare parts and components - standard AvtoVAZ spare parts can be found in any corner of the former CIS. The only drawback that a homemade Zhiguli tractor will have is that the fuel is relatively expensive gasoline (almost all industrial tractors run on diesel fuel), which makes such homemade products more expensive to operate, but this disadvantage is covered by cheaper spare parts for Zhiguli, and most importantly - cheap manufacturing.
The VAZ-2121 Niva is best for making a tractor, you can make a good mini tractor from UAZ. In the latter case, it is possible to use diesel engine, which makes its operation more economical (that is, the disadvantage of such a rework is actually eliminated). However, in the absence of a Niva or UAZ, engines from other models can also be used: VAZ-2101, VAZ-2103, VAZ-2104-2105, VAZ-2106, etc. You can buy engines and latest models Zhiguli - they are more economical than their predecessors, which will significantly save energy during operation.
Some aspects of the rework
When the need arose for a tractor, you can always implement the idea of your own version of this machine from improvised materials. At the same time, the cost of rework will be significantly lower than the cost of the finished product. So, a minitractor from the Niva will be the best assistant in the garden, since the car has a 4x4 drive formula. However, there are some legal points to keep in mind:

- If an old car is purchased, it should be re-registered in accordance with applicable laws. The same applies to the transfer of a car under donation agreements.
- After the re-registration, it is necessary to notify the traffic police about the planned alterations. At the same time, they are obliged to inform the mechanism for handing over state numbers from an old vehicle (car).
- Upon completion of the manufacture of the minitractor, it is necessary to supply a new vehicle(tractor) for registration with obtaining a license plate. Moreover, if this vehicle will be used only in rural areas, then a simplified procedure for registering this vehicle can be carried out.
However, people do not comply with these requirements and actively use their alterations for their intended purpose. To be fair, it should also be noted that law enforcement officials often turn a blind eye to these offenses, since they are minor (especially if the tractor does not leave the village and does not become a participant in a traffic accident).
But in order to avoid and significantly reduce the likelihood of problems with law enforcement officers, it is recommended to go through the re-registration procedure. If a home-made tractor with a VAZ engine is used only on one plot of land, it is recommended that you first write off the engine numbers of the car and the body number - this will simplify the engine identification procedure in the future (in case of problems with the traffic police).
What is a mini tractor
 A mini tractor is understood as a multifunctional universal machine that can perform a fairly large number of tasks on processing an agricultural plot, sowing, harvesting and some utility work on medium-sized land plots. Among the work performed are: arable work on light soils, cultivation with harrowing, inter-row cultivation of crops, spreading fertilizer on the site, haymaking and grass mowing, clearing the area from snow, debris, debris, using a mini tractor as a bulldozer when filling holes and leveling surfaces .
Another task of the minitractor is the transportation of various goods. When installing additional equipment (modules) on the tractor, it can also solve a number of other tasks: woodworking, drilling, digging holes, etc.
The layout of the minitractor is almost the same as that of its larger counterpart, but the main difference is the internal combustion engine of less power. Typically, mini tractors use internal combustion engines with a capacity of 8 to 50 hp. with. However, a minitractor with a VAZ engine (from a car, for example, a VAZ-2106) will be more powerful, although it is performed in small dimensions. According to the classification of the state traffic inspectorate, tractors that have an engine power of more than 50 hp. s. are subject to registration.
By itself, the minitractor will not perform the above tasks, for this it is necessary to install additional devices and units: mowers, plows, graders, etc. Some of them are also made independently, but there are industrial samples of such units.
If you have an engine and a frame with a chassis from a car, you can make a mini tractor with your own hands quickly and cheaply. However, if there is no old car, then it makes sense to purchase an industrial-made mini tractor, their cost is low, about 2-5 thousand dollars. Almost the same will cost the old car.
However, if a decision is made to convert an old car into a tractor, then you should use the tips below.
Independent production of a tractor from SUVs (Niva, UAZ)
The first thing to do after receiving a used car for conversion is to remove the engine from it, sort it out and carry out other preventive work. This will significantly increase the life of this engine. The same should be done for other vehicle components (transmission, running gear, etc.).
It is important to have detailed diagrams of the future mini tractor, because some elements can then be difficult to find from memory.
When drawing up a diagram, it should be remembered that the engine must be placed in front of the driver's "seat" (similar to the tractor arrangement). However, to avoid additional costs and significant alterations, it can be left in its original place. You should think about how to close it: make a casing or use it ready from an old tractor, having previously “optimized” it for your model.
To reduce fuel consumption and make the tractor more compact, it may be necessary to shorten the frame. It is important to remember that it is necessary to scald it according to future dimensions. It should also be remembered that if the frame is reduced, it may be necessary to move the bridge. All these structural alterations must be taken into account when drawing up the drawings.
Next, determine the location of the fuel tanks. Usually the fuel tank is located behind the driver's seat, which allows you to guarantee quick access to it. It should be remembered that the front suspension needs to be strengthened. Changes should also be made to the drawings that will affect the chassis. It is optimal to replace the wheels of the car with wheels of a larger diameter to ensure better tractor patency. However, such a replacement will cause a sharp increase in power consumption for the rotation of the wheels and the movement of the tractor.
When the drawings are ready, you should start implementing the mini tractor project.
Execution of works
The first step is to thoroughly check the frame. All rusty parts need to be processed sandpaper to bare metal (remove rust), then primed in 2 layers. If necessary, the frame is welded.
Further, if you want to shorten the frame, then you must first remove the coating from it at the place of trimming, mark it and divide it with a grinder or a gas cutter. After that, new stiffeners are welded at the place of trimming (usually the trimmed frame is cut into metal, which can be used later). If necessary, the bridge is also transferred.
 It should be remembered that the welds must be cleaned, the welding points must be degreased, and then primed in 2 layers or apply a special anti-corrosion coating.
This will significantly increase the service life of the product due to the organization of additional protection for the metal. In the absence of a finished automobile frame, you can weld it yourself using channels and corners for this purpose.
A do-it-yourself tractor should be made carefully and carefully, since any vehicle is a source of increased danger, and an error in its manufacture can be fatal for a driver or an accidental person.
The next stage of production is the installation of the chassis. Since the described version uses a frame from a car, it is more logical to take the chassis from the selected car. It is important to check all nodes and its functioning. Special attention should be given to the braking system, because the safety of the vehicle depends on it.
It should be remembered that when replacing car wheels with wheels of a larger diameter (for a tractor or mini tractor), the brakes from the old running system will not work. It will be necessary to purchase new ones for the hubs of the selected diameter (the diameter of the hub depends on the diameter of the wheel). It may also be necessary to replace the bridges if the hubs and wheels are much heavier than the previous ones, but this is extremely rarely required, since the wheels for a minitractor are not significantly heavier than the wheels of SUVs, and in addition, domestic designers put a large margin of safety into their cars.
In order for the minitractor, assembled on its own, to perform the functions assigned to it, an already sorted engine is installed on it. It is more logical to install it in the same place where it stood. At the same time, it is important to weld a protective cover for it, because the standard car body will not be able to provide it with proper ventilation - the engine will work with increased load, and it needs additional cooling. To do this, in addition to installing a radiator, you should open the engine from the sides - this will be quite enough to provide cooling. The minitractor with the engine is almost ready, it remains only to install a place for the driver, controls and determine the attachment points for additional units.
The next step is to arrange the controls in a convenient place. Their place of installation is determined at the design stage according to personal desire. The driver's seat is also installed there. To do this, you can use both chairs from the car, and homemade products. After that, the place is closed with a makeshift cabin. For its manufacture, you can use the metal left over from the car body.
The last stage is the installation of attachment points for additional equipment. Usually they are installed in front and behind the tractor.
Conclusion
Similarly, mini tractors are made from other VAZ models, the only difference is only the need to strengthen the frame.
It should be remembered that before you make a mini tractor, you must first coordinate the alteration with law enforcement agencies - this will avoid problems in the future.
As you understand, the name of the mini-tractor is a joke, in fact, components from VAZ-2102 and UAZ cars were used.
How long did it take to build a tractor?
The tractor was built from scratch, having spent almost two years on work. For its construction, a working VAZ-2102 car and an abandoned ZAZ-968, a decommissioned and half-rotted frame of a UAZ truck, had to be destroyed. Instead of the cut back of the frame, segments of 100 mm channel are welded on.
The photo shows bushings welded to the bottom of the frame, those above the fenders of the front wheels. This is a fastener for a pusher knife, for example, for cleaning snow. For heavier purposes, it is hardly possible to use it due to the low weight of the tractor (about 700 kg).
Three arcs are welded on the hood panel. They serve as handles if you need to climb onto the hood or bumper. They are also limiters when carrying cargo on the hood. It is designed in such a way that it can withstand a weight of 100-150 kg. For example, several bags of potatoes.
What exactly is used from the VAZ-2102?
From the VAZ donor, the entire power unit was used as an assembly: engine, gearbox, clutch control, pedal assembly, electrical equipment, instruments, lighting equipment.
 To reduce the speed of the tractor, a reduction gear with a reduction ratio of 3.5 was used. This is an onboard gearbox from an electric car. The connection of the gearbox with the gearbox using a shortened UAZ cardan. On one side of the cardan is a VAZ connection with a rubber clutch, on the other side is a UAZ cross. Connection of two fragments of cardan shafts by welding after preliminary adjustment on a lathe. The connection of the gearbox with the rear axle is direct "flange to flange". Operational practice has shown that this is not the best solution. It would be necessary through a rubber clutch.
What is used as a rear axle?
 Rear axle used from UAZ. The long stocking is shortened to the length of the short stocking so that two standard short half shafts can be used. It is quite simple to make a short one from a long semi-axis: a flange is cut off, a hole is drilled in the center on a lathe, the semi-axle cut is processed and inserted into the hole and scalded from the outside, the excess is cut off.
The cut stocking is connected by welding, the chamfer is preliminarily removed on the cut. Boil in a circle several times until the chamfer is filled, then boil from above until a good weld is obtained. Then a gas burner warms up the place of welding to a dark red glow and cool in air. For insurance, a caliper is superimposed on the welding site, indicated by the number 2 in the figure. This is in case there is an impact on the rear axle. In fact, the stocking must be removed from the crankcase of the bridge, but there are problems with drilling the plug, knocking the stocking out of the crankcase, then somehow shortening and turning on such a lathe, which are not very common.
Attaching the axle to the frame using a V-shaped structure (number 3), supported by standard rear axle cushions and fastened to it with stepladders.
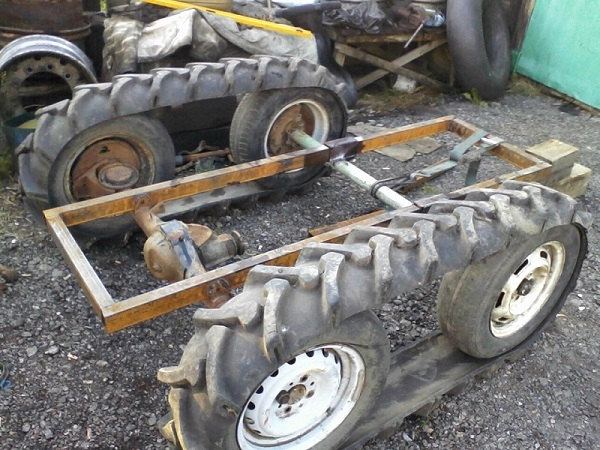
How is the front axle.
 The front axle is welded from thick-walled pipes, the wall thickness is 8 mm. Probably drilling. (See the picture below) At the top of the side racks, there is a swivel device made of VAZ wheel bearings. Bearings top and bottom. From above it is closed by a cover, through it there is a rotary axis. It is fixed with a Zhigulev hub nut. The front hubs from ZAZ-968 are embedded in the lower - swivel part. How to do this is clearly visible in the figure on the right. Here it should be noted that it is necessary to install both long pivot pins. In addition, the fingers are made motionless by welding. It's rude, but they won't be needed anywhere else. Sleeves are made to pass through the pipe rack, which are welded there, and the fingers are simply inserted into them and fastened with nuts and locked.
The lower figure shows the steering rod. There originally stood from Zaporozhets, but it turned out to be rather weak. I had to replace it with a GAZ-53. Now you can tow it for it. Steering levers are welded into movable pipe racks. Also from GAZ-53. For durability, they are fixed with scarves.
Fasteners for the wings of the front wheels are welded onto the front axle racks. Mounting levers - two.

The swing axis of the front axle is made on the steering knuckle from the GAZ-53. It is better to do it on a fist from ZIL. It is more powerful and does not deviate to the side when turning, because. the GAZ beam has a bend, while the ZIL does not have this bend. The fist is made removable from the beam of the bridge. It is welded into the crossbar of the frame.
In the figure above the front beam, you can see the fenders, which are cut off from the rear of the frame.
What about the brakes and steering, the radiator?

The main brake cylinder was used from UAZ (GAZ-53). Zhigulevsky turned out to be small because of the rear UAZ working cylinders. It is clearly visible in the picture on the right. Next to it is the clutch master cylinder.
The steering gear and steering column are from UAZ, and the steering rod is also from it. A crossbar is welded into the frame for mounting the steering gear.
The engine cooling system works with a VAZ radiator. It is mounted in front of the engine with an inclination.
How was the cabin made?

The cabin was made separately and fixed to the frame with eighteen bolts through welded bosses. There is a seat on the cab.
A pedal assembly, an instrument panel, brake and clutch master cylinders, and electrical equipment parts are fixed on the front wall of the cab.
The rear wall of the cab is a gas tank. Tractor rear light boxes are welded to the left and right of the gas tank.


