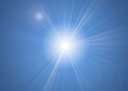
glare is a bright spot of reflected light on an illuminated surface, which appears as a specular reflection of powerful light sources. Such light sources can be, for example, the sun, flash or other lighting devices (Fig. 1).

Fig.1 Glare from the sun, which must be removed from the photo.
In many photographs, highlights look beautiful and are part of their composition, but sometimes highlights need to be removed. To do this is not as easy as it might seem at first glance. Difficulties arise due to the fact that the brightness of the highlight goes beyond the tonal range of the photograph.
Often, when removing a highlight from a photo in Photoshop, it is simply made darker, simulating the uniformity of the surface. This approach is possible in cases where the glare has an insignificant size for the texture pattern or it is reflected from a plain surface.
If the surface has a texture or pattern, details are lost in the glare, becoming a uniform white spot. Such a spot looks ugly, regardless of its brightness. The highlight is removed by masking it with the Stamp or Patch tools, but at the same time, the ability to adjust the boundaries of the restored area, its brightness, shape and location is lost.
The most difficult thing is to remove a large glare from a voluminous spherical surface, on which the pattern has curved lines, such as, for example, on. How to do this using simple Photoshop methods is described in this article.
How to remove glare and return details
If there is a highlight on the surface, then there is a part of the surface without it. This surface can be taken to restore the details lost in the overexposure area and in Photoshop, insert it exactly in place of the glare removed from the photo.
At the same time, it is possible to work with the replaced texture on a separate layer. This gives an advantage over the usual copying into the highlight area with Photoshop's Stamp or Patch tools.
As an example, in Photoshop, we will remove the glare from the photo on. So, in order.
Preparing a mask for a glare
In order to remove a glare from a photo, you need to localize it. It is convenient to do this with a mask. It will allow you to accurately highlight the glare and make a smooth transition from the surface of the material to the glare area.
We will create a mask of the glare removed from the photo in Photoshop from a copy of the background layer, which we will make using the buttons " Ctrl+J» (Fig. 2).
Fig.2 New layer for the mask of the glare to be removed.
To make a mask of a flare to be removed, you first need to select it. To do this, go to the Photoshop menu in the "Select" section and select the "Color Range" item. In the window of the same name below, you need to set the viewing mode "Black background" (Fig. 3).
Fig.3 Selection window for the glare to be removed.
In the “Black Underlay” mode, the photo looks like a layer mask, where the blurry area of the highlight is clearly visible (Fig. 4).
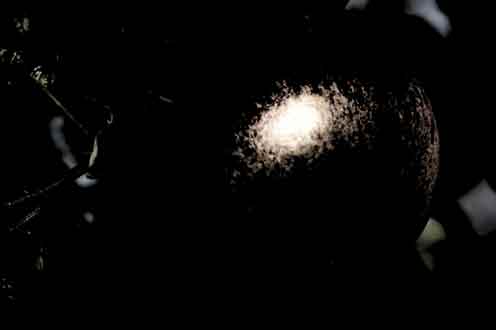
Fig.4 Removed glare in the "Black background."
In the "Color Range" window, move the "Scatter" slider and observe the photo mask. We need to get the full outline of the highlight. In this case, other areas of the photo will appear, which we will then remove on the layer mask (Fig. 4).
After the area of the glare to be removed is clearly visible on the mask, in the "Color Range" window, click the "OK" button. On the photo, the glare selection area will be loaded - the "ant track" (Fig. 5).
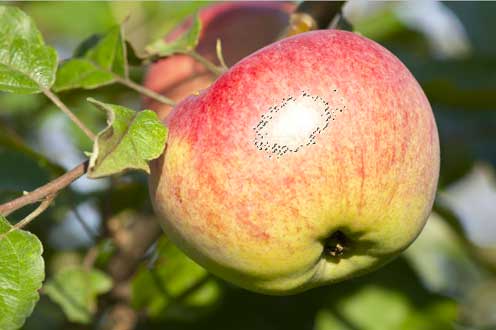
Fig.5 The selected area for the glare removed from the photo.
In this case, the selection line will be smaller than the highlight area on the mask, or it may not exist at all. Photoshop shows the selection area line only for its lightest part. The hidden part of the selection will be visible on the layer mask.
In order to create a layer mask, you need to go to the top layer in the Layers palette and, with active selection, press the third button from the left at the bottom of the palette. A layer mask thumbnail will appear in the layer (Fig. 6).
Fig.6 Layer mask for the area of the glare to be removed.
Now, while holding down the alt”, click on the layer mask thumbnail. A layer mask similar to the Black Underlay view will open. Select the “Brush” tool and paint over with black on the layer mask all the light areas except for the glare being removed (Fig. 7).

Fig.7 Only the area of the glare to be removed should remain on the layer mask.
Open the “Masks” palette and use the “Feather” slider to blur the highlight so as to remove its torn edges - about 35 pixels (Fig. 8).
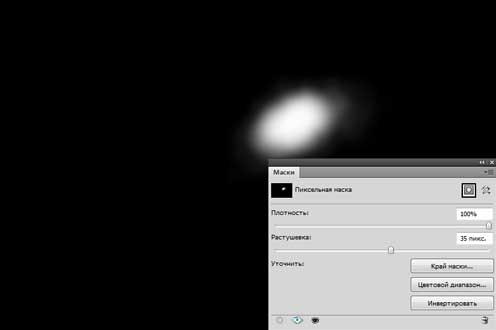
Fig.8 Blur the mask of the glare layer to remove the jagged borders.
After that, click on the layer thumbnail to exit the mask. Holding down the " ctrl» Click on the layer mask thumbnail. A smooth selection will appear for the highlight being removed (Fig. 9).
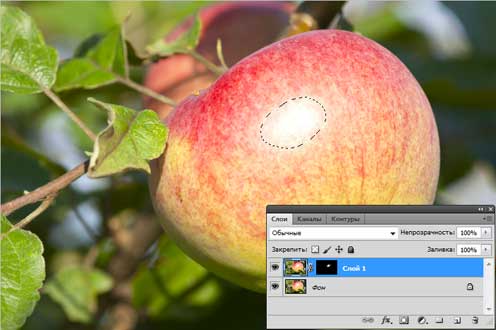
Fig.9 Selected area of the glare to be removed.
After the glare selection appears, on the Layers palette, click on the layer mask icon and hold down the left mouse button, transfer it to the trash can - the lower left corner of the palette, or turn it off by clicking with the button pressed Shift". For a possible correction, it is better to leave.
Button " Delete» delete the area of the glare to be removed, and use the « ctrl+d» deselect. The mask for the glare texture is ready. Let's move on to the next step.
Adjusting the Texture
First we need to prepare a layer on which we will choose a texture to fill the area of the glare to be removed. Go to the background layer and use the Lasso tool to select the object with the texture. You don't really need to separate. Only the texture should fall into the selection area (Fig. 10).
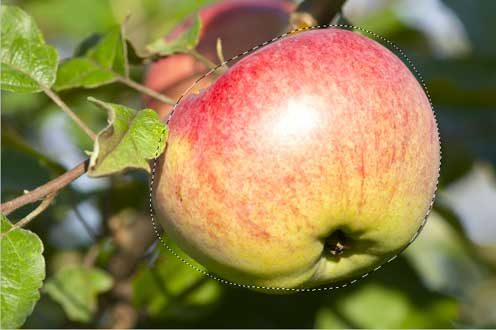
Fig.10 Selected object before copying to a new layer.
Buttons « Ctrl+J»Copy the selected object to a new layer. This will leave only the texture of the object with a glare on the layer (Fig. 11).
Fig.11 Layer with a texture for the glare to be removed.
You need to cut an object from the layer so that its borders are visible in the photo during the transformation. Otherwise, the photo area will need to be reduced, and this is work on a smaller scale.
Being on a new layer using the buttons " ctrl+t» Turn on the transformation mode. A rectangular frame will appear around the object on a new layer, with which you can transform it and see where it is under the mask (Fig. 12).

Fig.12 Texture layer in transform mode.
Button " V»select the move tool and start shifting the layer, adjusting the texture in the highlight to its borders. In our example, it is more convenient to shift the layer in the direction of the arrow. To fine-tune the texture, the layer can be rotated, shrunk, expanded, and its opacity changed.
In the case when the highlight has a large size, you do not need to try to fill it completely with a texture. It's better to do it piecemeal. To do this, we find the most successful option for filling the glare with a texture (Fig. 12) and stop there.
In the "Layers" palette, go to the top layer and click " E Select the Eraser tool. Adjust its opacity and pressure to 20 - 30% and pass it along the border of the pasted texture to make it less noticeable.
Go to the top layer and use the " Ctrl+Alt+Shift+E» Create a shared flattened layer. The result of the first texture adjustment for the removed highlight is fixed on it (Fig. 13).
Fig.13 The result of the texture fitting is fixed on the flattened layer.
After flattening the layers, a smaller highlight will remain on the photo. In order to remove it, you need to repeat the steps, starting with the creation. The flattened layer should be used as the background layer. Glare in our case is removed in three parts. For each mask, texture and flattened layer, create a separate layer group folder (Fig. 14).
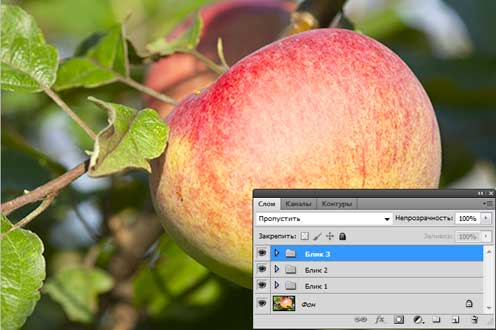
Fig.14 The area of the glare to be removed is filled with the texture three times.
In some photos, glare can be removed in one go, and more than three masks may be needed. It depends on the size of the highlight being removed and on the texture pattern. The more complex the drawing, the smaller the texture fill area.
This completes the texture adjustment. Let's move on to the next step.
We show the texture
After adjusting the texture in the area of the highlight to be removed, you need to align the light pattern of the object in the area of the highlight and around it in accordance with the lighting of the entire object.
In the "Layers" palette, go to the top layer and use the " Ctrl+Alt+Shift+E»Create a shared flattened layer over it. Select for it the blending mode "Multiplication" and create a layer mask (the third button in the lower part of the palette on the left) (Fig. 15).
Fig. 15 The overall flattened layer in the Multiply blending mode.
Button " B Select the Brush tool. Set its opacity to 15%. Buttons « D" and " X» Set its main color to white. Click on the layer mask and use the " Ctrl+I» invert it to black. We start painting on the layer mask, shading the highlight area (Fig. 16).
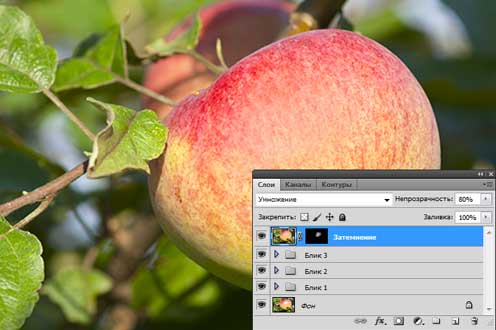
Fig.16 Align the brightness of the highlight area and around it.
After darkening the area of the glare to be removed, select its texture. To do this, use the " Ctrl+Alt+Shift+E» Create a shared flattened layer. In the "Filters" menu of the program, select "Other" and "Color Contrast". In the filter settings, set the radius to 7 pixels. (fig.17).
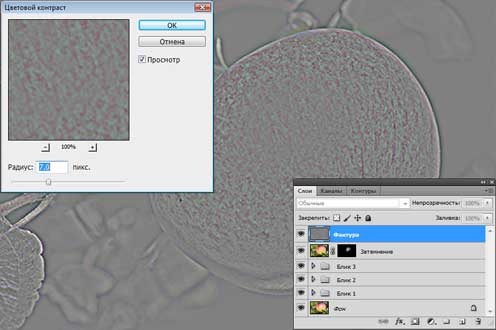
Fig.17 Apply the "Color Contrast" filter to the flattened layer.
Set the blending mode for the layer to Overlay, add a mask to the layer and invert it with the buttons " Ctrl+I". Select "Brush" with opacity 20%. Being on the layer mask, paint with white color in the highlight area, showing the texture of the material (Fig. 18).
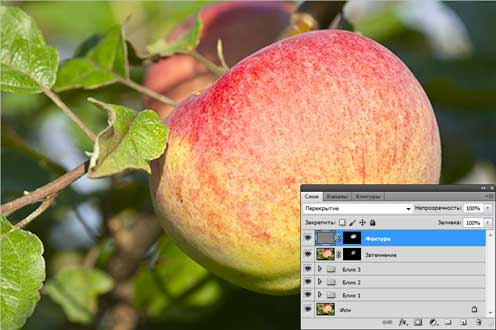
Fig.18 In the area of the glare to be removed, we show the texture of the material.
This completes the process of removing the glare from the photo. For comparison, Fig. 19 shows a part of the photograph with a glare before and after its removal.
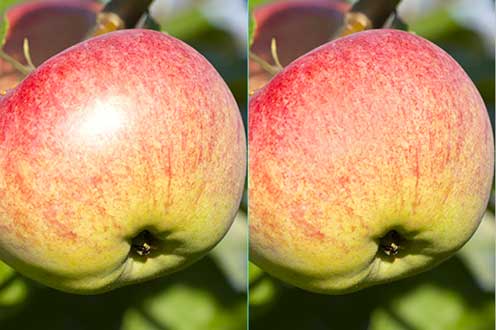
Fig.19 The area of the glare to be removed before and after its removal.
The whole process of removing the glare from the photo took no more than 5 minutes. With a clear understanding of all the points of this method, you can remove glare from photos very quickly. The source file with all the layers described in this article can be taken.
What else to remove from photos in Photoshop besides glare is described in the following chapters of the article: