As soon as you get your first professional camera, it seems to you that now you can do everything, and ... you start taking pictures in auto mode, sincerely not understanding why the professionals look at you with a smirk.
The thing is that the automatic mode, or as it is also called the “green zone”, is one of the top things in the contempt rating of professional photographers (after the whale lens, of course). It is considered "the fate of dummies," a label that turns all photographs into bad taste, no matter how talented they are. And therefore, knowledgeable people, when buying a camera for themselves, first of all scroll the mode wheel away from the “green zone”. Of course, you should not indulge the majority, and if you like shooting in automatic mode, shoot as long as it brings pleasure. But looking at it the other way around, there are quite a few downsides to auto mode where shooting in manual mode will give you more of both great shots and professional growth. Cons of the "green zone":
- Lack of RAW in Canon cameras.
- Often there is no way to correct the exposure.
- You cannot control the depth of field.
- In general, all levers, buttons and knobs become absolutely useless, the camera simply does not work out the money that you paid for it.
But if you're just getting into the art of photography, it's helpful to start with auto mode. And after you learn how to compose a frame, you can climb into the settings.
Manual camera setup: basic modes
- P– program mode. This mode is almost automatic, since the camera selects the exposure pair (aperture and shutter speed) on its own. You will be able to adjust only less significant parameters, such as: ISO, jpeg settings, white balance, etc.
- A or Av- Aperture priority. Here you can set the aperture value, and the camera itself selects the optimal shutter speed for it according to the data of the exposure meter built into it. This mode is the most commonly used by photographers as it allows full control over the depth of field.
- S or TV– shutter priority mode. This is where you set what you think is the appropriate shutter speed, and the camera sets the aperture value. This mode is quite limited and is usually used when photographing various sporting events, when it is important for the photographer to catch an interesting moment, and working out the background fades into the background.
- M- fully manual mode of the camera. Usually it is used only by those who are well versed in photography. All necessary parameters are set manually, various restrictions are removed, and you can set absolutely any aperture and shutter speed at any ISO value. Also, the flash in manual mode can be used by the photographer at his discretion. Free use of the flash allows you to achieve various artistic effects in your pictures. In addition, in this mode, you can take deliberately overexposed or underexposed photographs, shoot with lenses that were not originally intended for this camera, etc. Using the M mode requires the user to have a thorough knowledge of the basics of photography.
Setting the manual mode in the camera: M mode for different types of shooting
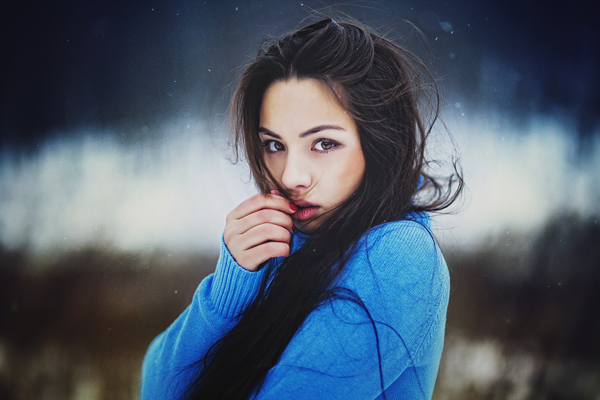
1. Settings for portrait photography Manually setting up a DSLR to shoot a portrait is a science. It is important to consider the lighting and how the light falls on the face of your model, based on this, set the main values. For example, when shooting a portrait indoors with windows that create pleasant natural light, you need to open the aperture to the maximum (for a “whale” it is f3.5-f5.6, and for a fast lens it is f1.4-f2.8), then it can be determined with exposure. Exposure, depending on natural light and lens, will range from 1/30 to 1/100. And the ISO value is best left as low as 100 units so that the image does not lose its quality. Such settings rarely result in underexposed shots, but if you do get a dark shot, then just turn on the flash and everything will be fine. When shooting in overcast or cloudy weather, there is usually a problem with the exposure of the frame. If you get dark photos, but you didn’t plan it at all, then in this case, increasing the shutter speed to 1/8 - 1/15 will help you, it would also not hurt to increase the ISO (200 - 400 units).
Sunny weather when shooting portraits is also not always on hand. You will have to compete for shots with minimal shadows! Moreover, by setting the aperture and shutter speed values only once, you will never be able to shoot from different angles and points. And therefore, throughout the entire photo shoot, you have to look at the resulting material every time. If you have a frame overexposure, then we advise you to reduce the ISO value, make the shutter speed a little shorter (about 1/800 - 1/1000). It is possible that you will have to slightly cover the diaphragm. If it is simply impossible to place the model in the shade, then use a flash - this way you can even out the light a little. 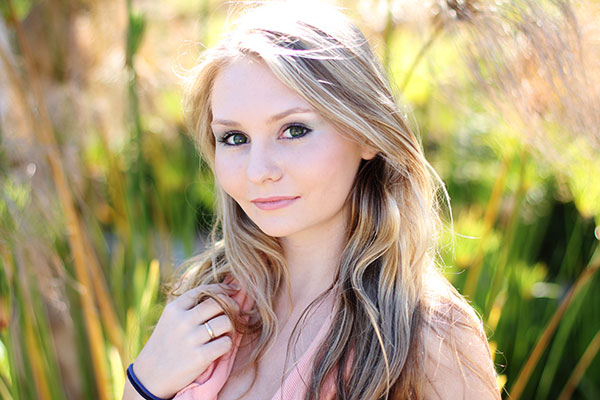 2. Dynamic scenes in manual mode. Photos that convey the dynamics of movement always look very impressive. Let's say you wanted to feel like a magician and use your camera to stop time and capture the first-class trick of a young and promising skater. To do this, you need to set the following parameters: shutter speed from 1/320, aperture from f4 to f 5.6. Light sensitivity: if there is enough lighting, then 100-200 units, if not - 400 units. If necessary, use a flash - it will add sharpness to the picture.
 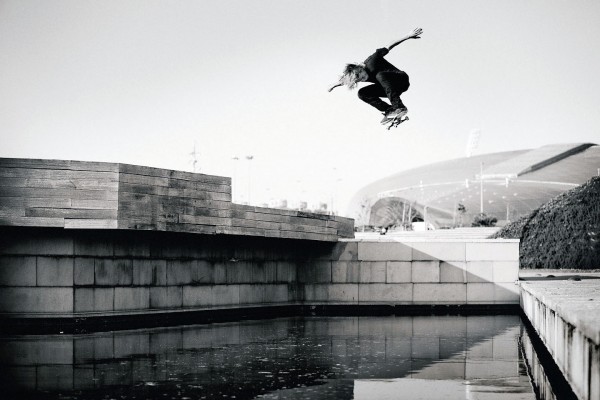 3. Photographing objects in manual mode in low light Shooting in manual mode is especially relevant at night. Walking around the city at night, fantastically beautiful fireworks, the romance of the starry sky, a concert of your favorite band - all this requires special camera settings.
- Concerts: ISO 100, shutter speed 1/125, aperture f8.
- Fireworks: ISO 200, shutter speed 1/30, aperture f10.
- Starry sky: ISO 800 - 1600, shutter speed 1/15 - 1/30, minimum aperture.
- Night city lights: ISO 800, shutter speed 1/10 - 1/15, aperture f2.
Flash setting in manual mode (M and TV)
TV/S (Shutter Priority) and M (Full Manual) modes are just perfect for convenient flash use, because in these modes you can set a fast shutter speed. In manual mode, the exposure depends on the shutter speed, aperture and ISO you set. You need to calculate the amount of light needed to illuminate the subject, and only then adjust the flash. Good brain training, right? manual mode will allow you to use a wider amount of flash output than the other modes.
It is worth noting that in any shooting mode, you may notice a blinking setting indicator in the viewfinder. This happens when the set parameters cannot "work" with the flash. The main reasons are the aperture that is inaccessible to your camera lens or the shutter speed is too fast and is not supported by your device or flash.
Shooting in manual mode: so which one to shoot?
- Aperture-priority (AV) mode - in our opinion, great for everyday shooting. Choose the required aperture value (based on what kind of depth of field you want to get), and the camera will select the desired shutter speed itself.
- Program mode (P) - of course, it allows you to change the shutter speed and aperture settings, but it does this only in pairs. When making the next frame, the values will be set automatically again, and it is possible that you will need to adjust them again.
- Manual mode (M) is great, but very inconvenient because it requires a large number of all sorts of manipulations, and the probability is much greater.
Make sure the exposure matches the subject you are going to capture. If the subject is evenly lit, choose evaluative metering, and if there are objects contrasting with the general background, select spot or partial. Are there equal numbers of dark and bright objects? Choose center-weighted metering. There is no perfect "recipe" - experiment and learn from your own experience.
And one more piece of advice. Work in RAW! So you can increase the likelihood of "rescuing" good composition images that have technical problems. Good luck!