What should be the water supply scheme of the apartment? Before starting work
You have come to the conclusion that the pipes for the water supply in the apartment need to be replaced, because the existing water supply system is rotten and unusable. The issue of replacing communications can also be prompted by such factors as the need for major repairs in the apartment, moving into a new building, where, apart from the walls, everything will have to be done by hand. If the apartment is new, then here you have the cards in hand, as they say, since a well-thought-out plumbing scheme in the apartment can turn out to be convenient to use. Before starting work, one important point should also be taken into account: do-it-yourself plumbing in the apartment should be installed in parallel with the water filtration system.
Filter elements can be installed both for each tap separately and at the inlet, after the metering device. This should be taken care of at the very beginning, before installing the plumbing, since the quality of the water consumed and the state of your health will depend on this. In addition, filtered water contains a small percentage of impurities and salts, which will significantly extend the life of pipes and auxiliary equipment.
Before proceeding with the installation of the water supply system, it is necessary to solve a number of questions:
- Select pipes and, accordingly, the material from which they will be made.
- Determine the number of fittings, valves, taps, pipes, risers and other elements of the plumbing scheme. To facilitate the solution of this difficult issue, it is necessary to carry out planning.
First, a water supply scheme for the apartment should be drawn up, the plan of which should be displayed on paper in the form of a drawing, taking into account the layout of the premises.
A well-designed drawing will help determine the choice of consumables and the number of all elements of the plumbing system.
The old plumbing system can tell you how many pipes you need for installation if you do not decide to do a complete redevelopment plumbing system. When planning a plumbing system, do not forget to think about the possibility of connecting additional equipment for the future, for which it is necessary to prepare reserve places for their connection.
Water distribution methods
Laying water pipes in the apartment. Tee and collector scheme for the water supply of the apartment.
Installation of water pipes in an apartment can be carried out in several ways, the most relevant and technically correct are the tee and collector schemes. Let's look at them in more detail:
A tee (series) scheme for connecting a water supply system in an apartment implies a wiring from the central water supply line to all consumers separately. With this connection method, a large number of connecting elements are used, however, the consumption of pipes is slightly less than when using the collector method. In addition, laying a water pipe in an apartment using tees and fittings is not a complicated structure, and at a price it comes out quite affordable. The significant disadvantages of this scheme include the periodic flow of water at some junctions, since the system consists of many individual elements. In addition, at some connection points, a decrease in water pressure may be observed. Possible in the apartment.
Water supply wiring diagrams in the apartment
The collector connection scheme is considered more reliable, although the costs for it will be significant. But the game is worth it, so it’s better to invest once in a competent installation of water supply in an apartment. Distinctive feature This scheme is the independent connection of each consumer in the apartment from the supply branch, which makes it easy to carry out preventive maintenance, repair and replacement of each of them without turning off the entire water supply system. This, unfortunately, cannot boast of a sequential scheme, through which a water supply device can be mounted in an apartment. In addition, the replacement of water supply pipes in the apartment will not be any problem, since in certain sections of the water supply system this can be done autonomously. This connection scheme is practically devoid of serious shortcomings.
Hidden and open laying of water pipes in the house
Surely you had to deal with the fact that the pipes located outside begin to irritate over time, and they do not have a very aesthetic appearance. This is especially true for old apartments that have long been in need of repair. Remember how ugly the installation of plumbing in an apartment looks, especially risers and pipes in small toilets or bathrooms, which have to be sewn up with decorative screens, thereby limiting the already scarce space. Therefore, open pipe laying has a certain disadvantage. But the hidden gasket will allow you to remove the pile of pipes. In addition, replacing water pipes in an apartment in a hidden way has a number of significant advantages. Both methods have certain characteristics and advantages:
With the hidden method, the pipes are embedded in the strobes of the walls, then they are sealed, after which the room has a beautiful appearance. Replacing the water supply risers in the apartment is also necessary, because over time their clearance narrows and they become clogged, which can lead to undesirable consequences. In addition, pipes hidden in the walls do not interfere with arranging furniture, plumbing fixtures, household appliances and other equipment, which are sometimes impossible to install due to the fact that the pipes simply interfere. In addition, the absence of pipes from the outside eliminates their damage.
Replacing water pipes in an apartment in an open way also has positive nuances. First of all, there are no restrictions when choosing consumables, so any pipes can be installed. Installation and replacement of water pipes in an apartment does not require cutting out the strobe for their installation, which means that the costs will be much lower. In addition, replacing a leaky element of the system will not be any problem, and it will be much easier and more convenient to do this than in a hidden water pipe. The disadvantages include an unsightly appearance and a decrease in the useful space of the room, which is why sometimes it is not possible to install, for example, a furniture module.
What pipes can be used for installation?
Pipes made of stainless steel are considered durable, since their service life exceeds 60 years, besides, they are not afraid of rust and growths. They are easy to install, however, such pipes are very expensive. Through them, for example, through heated towel rails, the temperature of hot water supply in the apartment is easily determined.
Copper pipes are also expensive, but they can last up to 80 years and are very easy to install. They are not afraid of corrosion and can be easily bent during installation.
Polypropylene pipes have good strength and can be used for over 50 years. For installation, you will need a special soldering iron and a hacksaw (or scissors) to cut them. It is recommended to lay a branch with hot water with pipes reinforced with metal or fiberglass.
Polyethylene pipes are also connected by welding. They are quite durable and can last more than 40 years.
Provide comfortable accommodation in an apartment is possible only with careful planning of all relevant systems. First of all, it is electricity, gas communications and water supply. It is about the distribution of water supply in the apartment that will be discussed further.
Types of plumbing
All installation work must be carried out after drawing up a wiring plan and calculating materials. This will help to significantly save time and reduce material costs. By appearance There are two wiring options: open and closed installation.In the closed method of installing water pipes for laying highways, strobes are used - trenches hollowed out in the wall. It is in them that all pipes are installed. This method is considered the most expensive, but from a design point of view, it is preferable. Outside there are no traces of water pipes and unaesthetic connections. On the other hand, a possible leak of the system requires complex manipulations, and after its elimination, it is necessary to restore the integrity of the walls.
The open method in this regard is much more practical, because there is access to any point in the system without any extra effort. The disadvantages of this method are the unaesthetic appearance of the plumbing elements, as well as the reduction in usable area, which is not always appropriate for small rooms.
An open or closed way to install water pipes - you can decide for yourself by paying attention to the following facts:
- Hidden plumbing does not take up extra space, is aesthetically attractive and is considered a professional plumbing job.
- For small bathrooms and toilets, a closed way to install plumbing will be the only right decision ().
- Preventive inspections of the system are easier to do with an open pipe installation method.
- In the event of a fire, there is a chance that the communications will remain intact, which means a reduction in restoration costs.
- For beginners it is better to use open way installation, because you can quickly install and fix problems.
- For the installation of open water supply, the range of materials used is wider.
- Leaks in the system are easier to detect and fix with the open version of the water supply.
- The open form of the water supply system makes it possible to supplement the system with new consumers.
Helpful Hint: To hide unsightly pipes and fasteners, you can use bezels made of the right material. This method can be called optimal, because it has collected all the advantages of both options.
You can choose the appropriate type of "disguise" according to the overall design of the bathroom. Usually, traditional materials for such premises are used for this: ceramic tiles, moisture resistant drywall and plastic panels.

Plumbing schemes in the apartment
In addition to the pipe installation method (), it is very important to determine in advance the preferred connection option for all consumers. There will be two outputs: serial and collector dilution of pipes. Both methods have their advantages and disadvantages, so it is advisable to think through all the nuances in advance.The second name of this method is the tee circuit, because tees are used to provide power to all consumers. It is thanks to these elements that all lines depart from the main pipe - the riser.

Installation of a tee circuit requires a minimum amount of materials and is not labor intensive. For beginners, this is the best option, since you can make a suitable scheme yourself. However, this type of connection also has a number of disadvantages:
- Many fasteners, which increases the risk of leaks and makes them difficult to detect.
- The simultaneous inclusion of several points of consumption creates a lack of pressure in the system, so the most distant point will be with a weak pressure.
- Repair work requires a complete shutdown of water, which is not always convenient.
Collector wiring is carried out according to the principle of parallel connection. This provides the necessary distance from the main source - the riser. With the help of separate pipes, each source of consumption has its own wiring. Of course, with this connection, the need for materials greatly increases, but this method also has its advantages:
- constant pressure in the system.
- Elimination of leaks occurs when the water is partially turned off.
- Diagnosis and prevention of leaks is easier than with a serial connection.
- Relatively few fasteners, which ensures greater reliability of the system.

However, the method is not without drawbacks. Coupled with the aforementioned increase in material consumption, such a connection requires more skilled work. It will be problematic to carry out pipe routing on your own, and involving a specialist will increase the repair budget.
Instructions for self-wiring water pipes (video)
It is possible to lay the pipes of the water supply system to the wave with your own hands:- Draw a layout plan on paper . It should indicate the actual dimensions and all used water consumption points.
- Choose the best piping option . You can use a combination of open and closed wiring methods.
- Fulfill the ground rules . The wiring must be carried out taking into account such requirements: the pipes do not intersect and are located as close to each other as possible. At the same time, it is desirable to choose the most a simple circuit without unnecessary connections and fasteners.
- Install inlet valves ( Ball Valves) . They are installed directly to the sources of hot and cold water supply to the apartment. This will help to shut off the water if necessary, repair work, connection and replacement of individual elements of the system. Also study .
- Run a separate water supply . It is performed when necessary, and is intended for consumption. In this section, it is necessary to mount deep filters.
- Install counters ( ) . They are also mounted first. After them, pressure reducers are installed, which provide control of the water pressure to the devices used.
- Installation of other elements of the system .
The video shows the piping of the water supply system and the end result of such work. For example, piping in a new building is used. The selected type of wiring is a collector circuit. In addition to laying pipes to consumers, the master describes how to install and mask water mains. Such a video instruction will definitely come in handy for novice plumbers, and some tips from a professional will help you avoid mistakes and wasted time when doing the work yourself:
Installation of the plumbing system of an apartment is a crucial part of arranging a new home. Properly executed wiring will ensure comfortable use and reliability of the system. The laying methods and instructions for self-installation of water pipes described above will help to carry out the installation work correctly.
Our topic today is the distribution of water supply and sewerage in an apartment. We have to get acquainted with the regulatory requirements for these engineering systems, find out what materials can be used for their installation and how to properly perform this installation. So, let's go.
Areas of responsibility
- Who is responsible for the condition of the sewerage and water supply in the apartment?
However: SP 30.13330.2012 prescribes the use of materials for water distribution with a service life of at least 50 years for cold water and 25 years for hot water. This instruction is relevant for all buildings under construction and for those put on overhaul old buildings.
Regulatory requirements
- What kind regulations regulate the installation of sewerage and water supply in the apartment, and what are the requirements for these systems?
requirements for internal engineering networks are set out in SNiP 2.04.01-85, however, during the design and installation, an updated version of the document is used - the notorious set of rules SP 30.13330.2012.

Here are excerpts from his text, one way or another affecting the distribution of water and sewerage in the apartment.
Water pipes
- For distributing drinking water, you can use materials that have a hygienic certificate;

- For hot water it is necessary to use pipes with a temperature resistance of at least +75 degrees. It is up to this value that the temperature in the DHW system can rise;
Author's note: in houses with hot water supply directly from the heating network (that is, in the vast majority of Soviet-built buildings), a situation may arise when the water temperature rises to 100 degrees or more. To do this, it is enough not to switch it from the supply to the return pipeline with the onset of cold weather.
- Towel dryers must be connected to the risers of the DHW circulation system. In this case, the dryer must be equipped with shut-off valves and a bypass;
- The water pressure in the pipes can reach 6 atmospheres;

It is worth clarifying: for new buildings, the maximum allowable pressure value is lower - 4.5 kgf / cm2. Up to 6 kgf / cm2 it can rise in the water supply system of a building erected in the conditions of the existing development.
- Water distribution in the apartment can be open and hidden. At the same time, serviced connections of pipes and fittings (including threaded ones) cannot be hidden;
- With the joint installation of sewerage and water supply, sewer pipes are laid below;
- When installing hot water and cold water pipes together, pipes with cold water are laid below;

- Long DHW pipes made of polymeric materials must be equipped with compensators (bends and sliding clamps, which exclude pipe deformation due to elongation during heating);
- Pipes with which water supply is diluted must have constant hydraulic resistance throughout the entire period of operation;
Hint: on the practical side, this requirement means that you cannot dilute water with black steel pipes. Rust and lime accumulate on the inner surface of their walls, limiting the throughput of the water supply and reducing the water pressure.

- Shutoff valves must be installed at the water inlet to the apartment;

- Cold water and hot water connections must be equipped with water meters (they are placed at the entrance to the apartment after the taps);
- There must be a filter (mechanical or magnetic-mechanical) in front of the water meter;
- The water meter must be equipped with a check valve installed before or after it;

- The standard diameter of an apartment meter with a water consumption of up to 10 cubic meters per day is 15 mm.
Sewerage
- Sewer pipes must not be installed with deformation or tension. For bends and turns of the comb, you should use a style (corners, half-bends, etc.);
- It is desirable to make connections to the outlet comb for connecting plumbing fixtures with oblique corners and tees;

- In areas of sewerage limited by turns, tees or revisions should be installed to clear blockages (if cleaning is not possible through outlets for connecting plumbing fixtures);
- Sewerage is laid with a constant slope (0.02 for a diameter of 100-110 mm and 0.03 for a diameter of 50 mm).

Wiring diagram
- What is the difference between tee and collector wiring of water supply?
Tee involves a series connection of points of water intake to a common pipe. In the case of collector (beam) wiring, each device is connected to a common collector with its own supply.

- Which layout is more practical?
If we forget about the large material consumption and the need for hidden wiring of a large number of pipes - collector. It removes the problem of pressure drop on all devices when parsing water through one of them.
If you open a cold water faucet in the kitchen, the cry of a spouse scalded with boiling water will not come from the bathroom, full of bitterness and pain.

The video in this article will more clearly acquaint you with how the layout of the apartment's water supply is carried out.
Pipes
- with your own hands?
The answer depends on ... the heating scheme of the house.
In buildings with an open heat supply scheme (with elevator units), hot water is taken from the heating network. In winter, the supply temperature of the heating main can reach 150 degrees. If a forgetful plumber does not switch the hot water supply to the return line, pipes designed for a maximum temperature of 90-95 degrees will make a strong protest: your apartment can simply be flooded with boiling water.

Note: if the water supply was installed with materials not provided for by the apartment's registration certificate, you will automatically find yourself the only culprit of flooding.
| Image | Description |
|
|
The zinc layer protects the steel from corrosion and eliminates the appearance of deposits on the walls. Installation of galvanized eyeliner is carried out only on threaded connections: during welding, low-melting zinc evaporates, and the weld begins to rust. |
|
|
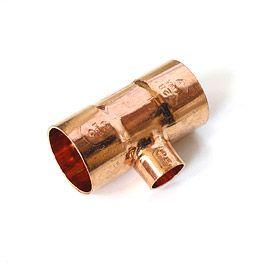
Copper. Copper combines the highest strength (destructive pressure is estimated at 200 or more atmospheres), heat resistance and bactericidal properties. For installation, solder fittings, as well as compression and press fittings, can be used. |
|
|
Stainless. With a wall thickness of only 0.3 mm, they are not inferior to a copper pipe in strength (destructive pressure declared for corrugated stainless steel by Lavita is 210 atmospheres) and heat resistance (let's heat up to 150 degrees). In addition, the pipes are extremely easy to install on compression fittings and can be easily bent with a minimum radius. The only disadvantage of the material is a rather high hydraulic resistance due to the corrugated walls. |


In houses with autonomous hot water supply or with water supply to the DHW system from heat exchangers, the water temperature and its pressure are much more controlled and stable. Here you can use any modern materials, without looking back at the margin of strength and heat resistance.
Here are the key features of the most popular types of pipes:
| Image | Description |
|
|
Polypropylene - probably the most popular material for plumbing. They are attracted by a combination of durability with ease of installation and low cost of the pipes and fittings themselves. Socket welding is used to connect pipes and fittings. |
|
|
Made of heat-resistant (PERT) and cross-linked (PEX) polyethylene. They are supplied in coils and are primarily used for concealed water collector distribution. PEX are connected by fittings using the material's inherent shape memory and compression fittings, PERT - socket welded fittings. |
|
|
Metal-plastic. In their production, modifications of polyethylene are used - PERT and PEX, and an aluminum core increases the tensile strength of the pipeline. During installation, compression, press and push fittings are used. |


A few nuances related to the choice and use of materials:
- On hot water supply, they are usually used with a reinforcing layer - fiber or aluminum foil. Reinforcement increases the tensile strength of the water pipe and significantly reduces its elongation at high temperatures;

- The aluminum reinforcement needs to be stripped before welding to the fitting. Without stripping, electrochemical corrosion of aluminum can lead to pipe delamination;

- When installing metal-plastic, it is very important to use a calibrator. An unevenly cut and uncalibrated pipe, when connected to a fitting, squeezes out the sealing rings of the latter from the grooves, and the connection leaks after a short time.

Please note: the problem occurs only on hot water. Cold forgives even the grossest errors in the installation of metal-plastic pipes.
- What pipes are used for sewerage?
PVC and polypropylene. The latter have a higher heat resistance (80 degrees versus 65); otherwise there is no practical difference between them. Connections of pipes and fittings - bell-shaped, with ring seals.

Useful: plastic sewer pipes conduct sound much better than cast-iron pipes used in the recent past. If you do not want to know the schedule for visiting the toilet by the neighbors from above, choose the so-called silent sewer - pipes made of plastic with mineral filler. They are easily recognizable by their white color.

Clips and adjustable clamps are used for open installation of sewerage on the wall. The fastening step should be no more than 10 pipe diameters: with a larger step, it will sag over time and form a constantly clogged area with a negative slope.

- What is the typical diameter of water and sewer pipes?
Familiar in the homes of our childhood, steel pipes are marked with a conditional passage, which approximately corresponds to the inner diameter and indicates the size of the attached pipe thread. For distributing water around the apartment, pipes of the size DN15, or 1/2 inch, were used. The same diameter can have a copper or corrugated stainless eyeliner.

Modern polymer and metal-plastic pipes are marked with a different size - the outer diameter. Accordingly, their size should be one step larger - at least 20 mm.
The toilet bowl is connected to the sewer riser with a 110 mm pipe or fitting. The remaining plumbing fixtures are attached to a 50 mm comb.

fittings
- What kind of fittings will require wiring in the apartment of water supply systems?
In addition to fittings for connecting pipes and connecting plumbing fixtures, you may need:
| Image | Description |
|
|
Ball Valves. This is the most fail-safe type of valves. Taps are mounted on the water inlet to the apartment and on the supply to the drain tank, and if necessary - in front of each plumbing fixture. |
|
|
Coarse filters. They retain sand and large suspensions carried by tap water. Filters are placed at the inlet, immediately after the taps, and significantly increase the life of mixers (primarily - devices with cartridges and ceramic taps, which are very sensitive to water quality). |
|
|
Water meters. Metering devices must have a diameter of 15 mm and be verified. After installation, the meter is sealed by a representative of the organization supplying water. |
| Pressure reducers. They are useful not only when the pressure in the water supply network consistently exceeds the norm, but also as protection against water hammer. | |
|
|
Check valves. They, as mentioned above, are placed before or after the counters. |
|
|
When autonomously preparing water in a boiler, you will need a safety group for it - safety and check valves combined in one housing. This device prevents the water heated by the boiler from draining into the water supply during cold water shutdowns and limits the pressure increase in the tank due to an increase in the volume of water when it is heated, dumping its excess into the drain. |


Conclusion
We hope that we were able to answer all the questions that are relevant to the dear reader. Good luck!
Rotted old plumbing in the apartment. Perspiration on the pipes, fistula after fistula; turn off the water, and then turn it on again - rust is gushing from the taps. And it is planned to repair the kitchen with a bathroom, and the old pipes are not something to touch or breathe - it's scary to look at them. We need to change, but the work is expensive. Is it possible to replace the apartment plumbing with your own hands? Yes, you can, and without any permits-designs. It will only be necessary to agree with the DEZ locksmith to shut off the water supply to the risers for a maximum of an hour; most likely, it will be possible to manage in 10 minutes. Or warn the neighbors, if not harmful, and block / re-apply yourself.
Replacement procedure
The replacement of the water supply is carried out in a certain sequence. Work "by eye" and "on the go" in non-professional performance often ends in a leak. The work plan is something like this:
- Choice of material for new pipes.
- Choice of hot and cold water distribution scheme.
- Development of a water supply scheme for an apartment.
- Calculation of the diameter of pipes according to the selected material and scheme.
- Preparation of the mounting tool.
- Purchase of materials.
- Assembly of selection and accounting units, their installation on risers and registration.
- Dismantling of old pipes and plumbing fixtures.
- Connection of HMS and aquastop, if provided.
- Connecting a flask filter (with HMS is required).
- Installation of hot and cold water pipes.
- Installation and connection of plumbing, old or new.
- Test water supply; elimination of identified defects.
- Installation and connection of the boiler.
HMS, flask filter and aquastop
HMS, or hydromagnetic system, has long been used in industry to prepare water for filtration. In everyday life, this device, without going into details, converts impurities in water into a fine suspension, which then settles in the filter in the form of sludge and is periodically removed. HMS is absolutely harmless, does not require power supply and maintenance during operation, but it necessarily requires the installation of a water meter in an antimagnetic design (these are more expensive) and, after the water flow, a combined flask filter.
The flask filter consists of three sections connected in series: the first one collects sludge, the second one removes chlorine, and the third one is used for fine purification of water and its softening. The latter (no one has been drinking tap water for a long time) is especially important for the washing machine boiler.

HMS with flasks cost a lot, but they protect well not only equipment, but also health. Complain or not, be indignant - do not be indignant, and drinking water is firmly held in the ten most scarce resources in the world, and there are no global programs that can bring its quality to the level of at least the middle of the last century, and are not foreseen. In general, the salvation of drowning people is the work of the drowning people themselves.
Aquastop is also a useful device, it also does not require power supply and maintenance, but its function is different. With a sharp increase in current (breakthrough) of water, the aquastop is triggered and its valve cuts off the entire apartment from the riser. Aquastops come in different systems, including electrodynamic ones, so an anti-magnetic counter is also needed when installing an aquastop.
Pipe selection
A new plumbing in an apartment begins with the choice of pipes. Steel in everyday life has become obsolete, and you have to choose from metal-plastic, plastic and brazed copper. This stage of work is perhaps the most responsible - the wrong choice will nullify all the efforts, expenses and troubles.
Copper
 One can say about copper water pipes right away: their propagandists do not know what they are talking about. Or they know, but they don’t set themselves. Firstly, copper oxide forms on copper in contact with water - the same verdigris that Tom Sawyer talked about to Huckleberry Finn. Yes, a person needs copper, but in negligible amounts in the form of a microelement, and not as part of a strong poison. As a counterargument, they say that copper forms a protective film with chlorine from water. Absurd for anyone who remembers at least school chemistry.
Secondly, the composition of the solder for copper includes tin. White tin, a soft metal, over time turns into its other, as chemists say, allotropic modification - gray tin, a crumbly powder. That is, by installing copper pipes (very expensive), we thereby 100% guarantee leakage. And the payment for the work of a company specializing in copper pipes, since it is impossible to solder them correctly on your own.
metal-plastic

Metal-plastic pipes are quite expensive, but they can be connected by hand without experience. Metal-plastic plumbing is assembled on special threaded assemblies with gaskets or under crimping - fittings. In addition, metal-plastic pipes can be smoothly bent. Hydrodynamic resistance and pressure loss in metal-plastic are very small.
To insert a pipe into a fitting, you need a pipe cutter, press tongs and a set of reamers (reamers) for the diameter of the pipes. With their help, work goes effortlessly, and with improvised means - a full guarantee of leakage. In addition, the life of gaskets in fittings is limited, and over time, the joint begins to drip. Therefore, bricking metal-plastic into walls is unacceptable, and it is strongly recommended not to hide it in strobes.
It is recommended to carry out water supply with metal-plastic in separate open areas, where the minimum resistance to water flow and the possibility of a simple and quick bulkhead of the joint are important: when connecting a boiler, washing machine, sink, etc. Adapters from metal-plastic to other types of pipes are always on sale.
Plastic
Plastic apartment plumbing has now become the standard, but plastics are different. For right choice you need to know their properties and features.
Polybutylene (PB)
Flexible plastic with good thermal conductivity for plastic. Holds temperatures up to 90 degrees. A properly soldered joint is absolutely reliable. Pretty expensive. Used for underfloor heating.
Polyethylene (PE)
Cheap, but for hot water, polyethylene reinforced pipes are needed; ordinary polyethylene does not hold 60 degrees. It is impossible to bend and glue, the soldered joint reliably holds a pressure of no more than 3.5 atm, and the water pressure in the city water supply can be up to 6 atm (0.6 Mbar) for cold water and 4.5 atm for hot water, so that there is a possibility of a sudden breakthrough. Hydraulic resistance, however, is the smallest of all.
It seems that polyethylene pipes are bad for everyone, but they have an advantage that can be worth all their shortcomings: they are not afraid of freezing. The ice cork bursts them, and when it melts, they shrink again, and do not burst, even if you crack. Therefore, the installation of a polyethylene water supply system is strongly recommended in unheated, seasonal and underground premises. There is no alternative to polyethylene. But with a constantly filled system, an aquastop is needed.
PVC (PVC)
The properties of polyvinyl chloride (PVC) are well known: chemically resistant, inexpensive, heat resistant up to 80 degrees, easy to glue, but not very strong and afraid of ultraviolet radiation. Joints, both soldered and glued, come out more brittle than solid material, so the danger of a breakthrough remains and an aquastop is needed. Replacing individual sections of glued PVC, of course, is more difficult than for collapsible metal-plastic, but easier than for soldered joints: heating the joint with a household hair dryer, the joint can be separated, and then glued again. In general, the option is budgetary or for a novice master with a length of the main branch from the riser to the farthest draw point of no more than 10 m and with no more than 7 sampling points.

Propylene (PP)
Laying an apartment water supply with polyisopropylene pipes (propylene) is now generally accepted. The material is not very expensive, durable, resistant, soldered joints retain all the qualities of the base, heat resistance - up to 130 degrees, properly soldered holds up to 12 atm. The hydraulic resistance is higher than that of PVC, but anyway, the accumulation of plaque in the lumen is minimal, and with HMS it is excluded. There are only two disadvantages when doing it yourself:
- It does not stick, and soldering requires special equipment and strict adherence to technology.
- It has a fairly high coefficient of thermal expansion. Immured in a wall or hidden in a strobe, it can bend and break the tile, therefore, when laying each pipe, you need to put on a stocking made of merylon or synthetic winterizer, which increases the cost of work.
However, the propylene pipeline is by far the only one that can be done once and for all and forgotten. Therefore, we will dwell on the soldering of propylene separately, especially since the soldering of other plastics differs only in a lower temperature (110-130 degrees for polyethylene and about 150 for PVC).
Propylene soldering
Soldering propylene with a handicraft “iron” soldering iron end-to-end (see the figure on the right) is unacceptable:
- Pollution accumulates on the “sausage” inside, and the pipeline assembled in this way is more prone to clogging than steel.
- The pressure of the water, bursting the pipes, tends to break the joint. At 16 degrees in the pipe and 20-25 outside, after about three months the fatigue threshold of the material is surpassed, and the joint flows.

The assembly of the propylene pipeline is carried out on fittings for soldering - straight (for connecting pipe sections), angular, tees, crosses. The pipe heated to softening is inserted into the holder of the also heated fitting, and the joint freezes. In this case, water pressure, on the contrary, presses the pipe against the casing from the inside, providing strength, and only sealing remains for the fused zone. The rather high rigidity of propylene does not allow the clip covering the pipe to expand elastically. It is this design of the connection, combined with the properties of the material, that makes the propylene pipeline suitable for immuring into walls for decades.
Note: a more or less decent soldering iron for propylene costs at least 2000 rubles. and is still unsuitable for something, but does not wear out from work. Therefore, you do not need to buy it, it is better to rent it.
- For hidden wiring in a typical apartment in strobes or monolithic - definitely propylene.
- For branches of great length with a large number of points of water intake - open metal-plastic or in channels with removable covers.
- For country houses, seasonal rental housing, country houses with remote outbuildings, greenhouses, etc. - polyethylene.
- For budget repairs or in areas with a shortage of water, low pressure in the water supply, with poor quality water - PVC.
Wiring diagram

Collectors-combs
There are two schemes for drawing water in the premises: serial and parallel. With a serial scheme, the points of analysis are connected to a common pipe through tees. This scheme is the most economical, but with a long wiring length, a large number of parsing points and / or with low water pressure, it is not suitable, as it greatly reduces pressure.
In this case, the water intake is done in parallel from the “comb” collector, see fig. A comb is an assembly of bypass valves, from each of which there is a solid branch to its point of analysis. The valves regulate the pressure separately by points. The branches to the points are made of metal-plastic or polyethylene: in this case, their low hydraulic resistance plays a role, and when laid in a single piece, they are quite reliable.
Development of a water intake scheme
The water supply scheme in the apartment is needed primarily for oneself, so as not to get confused, not to miscalculate, and then to know exactly where everything is - no special permission is required for this work. But when registering the meter, the water utility inspector may ask you to look at the diagram, so you need to draw it correctly.

A complete scheme according to all the rules is a serious job for a knowledgeable specialist; for example - in the large figure, the water supply scheme of a private house with a summer kitchen, which is necessary for the project to be approved. But to replace the pipes in the apartment, you don’t need to bother like that, it’s enough that the diagram clearly shows and understands:
- Hot and cold water pipes, their type and lumen diameter.
- Metering devices.
- Emergency valves and drains.
- Stop valve.
- Points of analysis with indication of consumers.
- Backup branches and devices.
- Direction of water flow.
To make all this clear not only to yourself, or to yourself a year later, certain rules must be observed when drawing. Let's look at examples, see fig. On the left - more or less okay, but with comments, on the right - wrong:

- The scheme on the right is made in isometry - for beauty, or what? The intersections of the pipes confuse her, and she does not give an idea of \u200b\u200bthe real location of the analysis points: the washing machine with the boiler comes out under the floor.
- There are also too many current arrows where it is already clear where it flows, which also confuses the circuit.
- In the same place, shut-off valves with metering devices are depicted indistinctly and not according to the rules.
- In the same place - the type and diameter of the pipes are not indicated.
- In the same place - who, where and when saw that water was supplied to the boiler from above, and the toilet was flushed through the ebb?
- But in the diagram on the left, it’s not even clear to a specialist that the boiler (6) is a backup. The remark will be: “Where is the check valve for hot? Without it, when the supply is stopped, the boiler will drive its own into the hot riser if the valve (10) is not closed. But this is already in essence and with full understanding.

Correct simplified plumbing scheme in the apartment
An example is arbitrarily, not according to the rules for designing design documentation, but completely understandable and without frills, the completed water intake scheme is shown in the following figure. This is also an example of a parallel drawdown; where the combs, of course.
Pipe calculation
Before finally choosing pipes, you need to calculate at least approximately their diameter. This is not necessary for "smartness" - the narrower the pipe, the cheaper it is, on the one hand. On the other hand, a too small diameter pipe for a water supply will cause turbulence in the flow in it. In this case, the throughput of the pipe drops sharply, and at normal pressure at the entrance of the tap will barely ooze.
The exact calculation of the pipeline is a matter of highly qualified specialists, but for a city apartment, in order to flow normally, you can figure it out yourself. The initial data is:
- The minimum allowable pressure is 0.3 at.
- Pressure loss per 1 m of a 16 mm propylene pipe - 0.05 at.
- The average pressure loss for apartment wiring per unit of fittings and fittings is 0.15 at.
- Pressure loss in the selection and accounting unit - 0.25 at.
- With normal values of pressure at the inlet to the riser of 1.5-4.5 atm, periodic turbulence is inevitable in a 12 mm pipe, and is not observed in 16 mm pipes.
- The headroom for the farthest point is at least two times.
It remains to find out the pressure (pressure) at the inlet, and you can determine whether, with the serial wiring of such a running pipe, there will be enough pressure for the farthest faucet or you will have to take it wider and more expensive. The pressure at the bottom of the riser can be obtained from the pressure gauge in the basement or from the building operator; then subtract 0.6 atm per floor. You can also estimate for neighbors based on the same 0.6 at / floor: if, say, three floors up from the taps, it still flows, then we have a good 2 at. But in high-rise buildings, such a trick does not work: in order not to overly increase the cost of apartment wiring, they make separate risers for the lower and upper, and even for the lower, middle and upper floors.
Calculation example: the second floor of a nine-story building; the residents of the upper floors do not complain about the water. We have at least 4 at pressure. 11 units of fittings (5 tees, 6 elbows, 1 valve) give 1.65 atm losses. The length of the pipe from the riser to the far wall of the kitchen is 6.5 m, which is another 0.325 atm of loss. In total, with the selection and accounting unit, we have 0.325 + 1.65 + 0.25 = 2.225 atm of losses. Too much, you need to check the pressure with a pressure gauge and, most likely, take the main pipe 20-25 mm, or bred in a parallel pattern from the comb, otherwise you can stay “dry” in the dry summer.
Note: from this it is clear how important it is to straighten the pipes and how undesirable they are to lengthen and clutter up with fittings.
The dependence of losses in pipes and fittings is non-linear: they depend on the flow velocity, which, in turn, depends on the cross section of the pipe lumen. A slight increase in the diameter of the pipe drastically reduces losses, so the usual 20 mm pipe wiring for apartments with taps to 16 mm points works well in most cases. AT difficult cases an accurate calculation can be made according to SNiP, internal water supply and sewerage of buildings. There are all the necessary formulas and nomograms; the calculation can be done by a person with an engineering education of any profile.
You just need to keep in mind that on this account there are already three SNiPs with the same index: 2.04.01-85, 2.04.01-85 (2000) and 2.04.01-85 * “(Domestic water supply and drainage systems in buildings) ". Correct - SNiP last.
Tools, materials, dismantling of the old
Special tools for assembling apartment pipelines are described above in the course of the presentation. For the purchase of materials, of course, you will need to calculate the footage, nomenclature and quantity in place. Dismantling of old pipes is done in the usual ways. It is better to do it after installing and registering the water meter, so as not to turn off the water to the floors for a long time.
We will give only one piece of advice: do not take valves with a lever. It is made of silumin or plastic and tends to break off at the most inopportune moment, just when you need to urgently close it. Take ball valves with a butterfly handle. Round corrugated handles also do not break, but wet or sweaty hands slide on them.
Accounting and control
The selection and accounting unit consists of a shut-off valve, a coarse filter, a water meter and a check valve. Assembled as shown in the picture. Each of the devices indicates the direction of the water flow for it, it must be observed during assembly.

The assembly is assembled with waterproofing of the connections with the FUM tape and is also connected to the riser, having previously blocked the water; Remember to close the shut-off valve before supplying water. This is the only operation, and a short-term one, requiring turning off the water supply to neighbors in the riser.
Separate meter units are needed for cold and hot water. It is highly desirable that the counters and valve handles be highlighted in color. The meter readings should be clearly readable without any additional operations (hatch removal, etc.), so it is often necessary to pre-assemble a part of an integral pipeline, sometimes of a rather bizarre configuration, to connect metering devices to the riser. In addition to pipes and a soldering iron, for this you will need transitional couplings from plastic to metal MPV - a threaded inner coupling. Plastic is connected to metering units using MRN - external threaded couplings.
The meters are sold sealed, but this does not mean that you can immediately call the water utility and pay for water according to consumption. The factory seal is for this (the Russian land is rich in craftsmen) so that no one gets into the meter and twists or files anything there. The factory seal must be protected; without it, the meter is considered unusable, as well as without a certificate for it.
When installing water meters, you need to declare to the water utility and call its inspector. You can use water before he arrives, the inspector does not need zero readings, he will write down the initial ones, seal the meter and filter drain with his seal. Payment for water consumption will go after registration of metering devices.
HMS, aquastop, filter
Although the design of the HMS is non-separable and does not allow stealing water with its help, and this device cannot be sealed, connecting the HMS to the meter is unacceptable: the meter impeller can become clogged with sludge. HMS with a flask filter is connected after metering devices; filter - immediately after HMS. An aquastop can be connected immediately after the filter, but if it is electrodynamic, the magnetic field of the HMS can cause its false operation, but it makes no sense to attribute the aquastop far from the riser: it does not react to a breakthrough before it.
Video: an overview of the layout options for plumbing elements
Pipeline installation
So, now we do the plumbing. The assembly of pipes has already been described, but the installation of the entire system also has non-construction features, such as the arrangement of channels in the screed. The latter should pass no further than 150 mm from the wall and no closer than 200 mm to the furniture. Plumbing fixtures, of course, are removed before starting pipe laying.
First of all, you need to install arcs - plastic strips with MRV squares for mixers. They are attached to the main wall with self-tapping screws in dowels. When attaching, you need to take into account the thickness of the finish: plaster and tile or other decorative coating.
Without a lot of building experience, it is very difficult to achieve the location of the outlet nozzles flush with the wall. It is better to make them PROPERTIES above the finished wall half the width of the side of the decorative faucet caps: if the caps are unregulated, they can be easily adjusted on an emery wheel or manually on an emery bar.

The next moment is the assembly of pipeline sections. The most convenient way is to assemble it on the table and put it entirely in strobes. But then the question arises: how to run pipes through walls? There are no problems with metal-plastic, it is all on detachable fittings, and for brazed pipes, two methods can be offered:
- With the help of MPH / MRV adapters and metal-plastic inserts. In an apartment, this is quite reliable, and in the corners above the strobes, you can make removable hatches for revision and repair of threaded connections.
- Install pipelines locally. This requires a compact soldering iron. This one is more expensive, and you need to work in cotton gloves so as not to accidentally burn yourself.
There are two types of piping - collector and parallel.
Before you start drawing the layout of the pipes and the position of the water distribution points, it is necessary to determine what equipment is planned to be installed:
Kitchen - cold and hot water mixer, dishwasher, water heater, gas boiler, gas water heater
Bathroom - shower, bath, sink, bidet, toilet, washing machine, water heater.
Even if on this moment there are no funds to purchase, for example, a shower cabin, it is better to think over the conclusions for connecting it in advance.
Consistent plumbing.
Sequential wiring is otherwise called tee, because. it is mounted in a single line and the wiring from a common pipe to plumbing fixtures is carried out using tees and elbows.
The disadvantage of such wiring is that it is impossible to block a separate connection, and the likelihood that the total water pressure will decrease when several plumbing fixtures are working.
Pros - simple and quick installation, low cost of components compared to collector wiring.
Consistent wiring of water supply pipes
(red shows hot water distribution, blue - cold).

Wiring with polypropylene pipes and installation of water sockets.
Collector wiring of water supply pipes
Most often, such a wiring is mounted where it is planned to hide pipes under plaster or decorative panels, run pipes underground or cast them into a concrete floor screed.
The advantage of collector wiring is that each consumer (plumbing fixture) has its own separate line, which departs from the common collector. With such a decoupling, at any time it is possible to block a separate point without detriment to other devices. With such a decoupling, a uniform distribution of water occurs, so the pressure (pressure) at all points will be the same.
The only disadvantage of such a system is the price, which includes a significant footage of pipes and fittings, as well as manifolds (distribution combs) with shutoff valves.

Collector distribution of water - scheme.

Collector of hot and cold water with shutoff valves,water filters, copper pipe connection.
Choice of mounting material
The choice of material is influenced by how the installation will take place, how the pipes will be laid - closed or hidden, ease of installation, i.e. the ability to do all the work yourself. Also an important factor is the price.
Many sources still indicate that plumbing can be made with metal, but is it worth saying that this is already yesterday. And that there are many good durable materials on the plumbing market, which are quite simply easy to install, have a long service life, are reliable, harmless, i.e. great for drinking water supply, and have a very nice appearance.
Below is a table with the comparative characteristics of pipes used in the installation of water supply.
Pipe material | pipe price | fitting price | additional | complexity |
skill required |
||||
stainless steel | Skill Required |
|||
metal-plastic | + / - | Easily |
||
Polypropylene | Easily |
|||
Polyethylene | Easily |
Installation of water pipes
Although there are two different wiring schemes, in practice they usually use either a serial circuit or a combined one - series-collector. The simplest materials in terms of installing water distribution are considered to be polypropylene, metal-plastic, XLPE pipes and copper.
Outdoor installation of water supply- pipes run along the walls. For open installation, polypropylene pipes are most often used.
Concealed installation water supply - pipes are laid in strobes and hidden with plaster, in a concrete screed, underground.
The layout of water supply pipes starts from the entry point, i.e. source of water supply pumping station, hydraulic accumulator, pressure tank, central water pipe entry.
The common supply pipe, in order to have the least pressure loss, must be at least an inch in diameter.
It is mandatory to install a coarse water filter and a shut-off valve.
Next, the installation of piping begins according to the selected scheme, i.e. pipes are run to the bathroom, kitchen, laundry. If the piping begins in the basement and the heating boiler is located there, then a separate exit to the boiler is made.
With serial wiring, if it is not planned to hide it with decorative panels and a box, it is recommended to mount the pipes 15–30 cm above the plinth. Thus, the pipes will be hardly noticeable and in some places hidden by plumbing fixtures.
When laying through walls and ceilings, pipes must be protected from damage. To do this, a casing pipe or a special cuff is placed in the hole.
Pipes are fixed with the help of special clips, plastic and metal clamps.
Installation with polypropylene pipes
You will need - a device for soldering with nozzles; pipe cutter; calibrator; fittings - tees, couplings, elbows, crosses, stopcocks; clips corresponding to the diameter of the pipes (needed to fix the pipes along the walls); pipes with diameters of 1 inch and ¾.
To supply water to plumbing fixtures in a private house, it is best to use ¾ pipes. This is due to the fact that when labeling polypropylene pipes outside diameter is indicated. For example, if the pipe is 1 inch, then this does not mean that there will be an inch passage inside, it will be the outer diameter, and, accordingly, the inner passage will be much narrower, due to the wall thickness.
A compensator is not required for the water supply system.
Installation is carried out sequentially. Pipes are easily cut and soldered. The cut off part of the pipe should be calibrated and deburred from internal burrs with a knife. After soldering, a characteristic shoulder should form.
For connections of polypropylene with pipes made of other materials and for the installation of water sockets, combined fittings with metal threads are used.

Polypropylene pipes and fittings.

Compound.
Installation with metal-plastic pipes
Such pipes carry out both open and hidden installation.
When open - you can use press fittings (not collapsible) and clamping (collapsible).
When hidden - only press fittings.
This is due to the fact that clamp fittings weaken over time, and twisting with a wrench is required.
For installation you will need - pipes 1 inch and ¾; fittings - elbows, couplings, adapters, tees, crosses; pipe cutter; calibrator; press tool for press fittings (can be rented); wrench for clamp fittings.
Metal-plastic pipes are sold in coils of great length, therefore, when laying pipes under a screed or plaster, it is advisable to use a single pipe.

Installation of connections using threaded fittings.

Pipes and press fittings.
Installation with copper pipes
Required - ¾ and ½ inch pipes (copper pipes have thin walls); gas-burner; a hacksaw for metal and a metal brush for stripping; flux paste; solder; fittings - adapters, elbows, crosses, tees, couplings, water sockets.
Mounting connections by soldering.
A sliding sleeve is put on the pipe
Using a press tool, the sleeve is pulled onto the “pipe-fitting” connection - the connection is non-separable, very durable. Such connections can be monolithic under the screed or plaster.
The end of the pipe and inside the fitting is lubricated with a thin layer of flux
The fitting is put on the pipe until it stops
The joint is heated until the color of the pipe changes.
Soldering copper pipes.
For open pipe laying, non-annealed pipes are used, for hidden pipes - annealed pipes (they bend easily).
Installation with XLPE pipes
These pipes are easily and simply mounted, but you will need a special crimping tool for mounting pipes made of cross-linked polyethylene, which can be rented; pipe cutter; calibrator; brass or PPSU (polyphenylsulfone) fittings - tees, couplings, adapters, elbows; pipes with a diameter of an inch and 3/4.
Installation of connections.
When choosing pipes made of cross-linked polyethylene, you should pay attention to their marking, i.e. suitability for drinking water supply.

Installation of connections.

Pipes and fittings.
And one more very important point that you should pay attention to after the water supply scheme is ready, and the selection and purchase of materials begins - this is quality!
You should not save and buy cheap pipes and fittings of dubious quality. The water supply system must be reliable, durable, strong and tight. And this applies not only to hidden laying, but also to open installation.
Materials should be purchased in specialized stores that give a guarantee for the goods and provide a certificate of quality for all products.


